How to configure and manage Apple Pay on your Mac
Apple designed its own mobile payment and digital wallet service Apple Pay that allows you to add your credit, debit, or prepaid cards to your iPhone, iPad, Apple Watch, or Mac and make secure purchases in stores, in apps, and on the web. Moreover, you may also send and receive money from friends and family right in Messages with Apple Pay. You need not to download any app and you may use the cards you already have in Wallet. It provides the best way to send money for books to your son in college, split a bill and chip in for a gift. BY using Apple Pay, you may send or receive money from across the table or across the country. If you are a Mac user and want to use Apple Pay, here we will provide you some easy steps to do that:
How to setup Apple Pay on your Mac?
By following the below given steps, you may easily configure Apple Pay on your Mac.
- First of all, open the “Safari” app and go to Safari > Preferences.
- Switch to the “Privacy” tab and then check the box next to “Apple Pay” to allow websites to prompt you with the payment option.
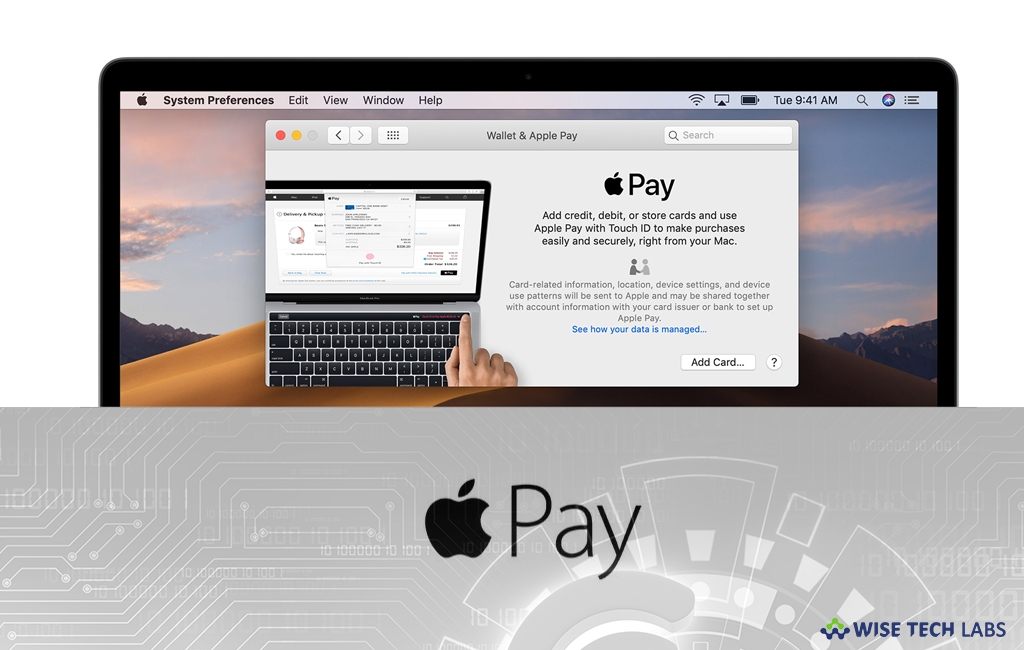
- If you are using MacBook Air or MacBook Pro, open “System Preferences” and then click the “Wallet & Apple Pay.”
- Now, press the “+”button to add a new credit or debit card.
- From here, it will try to automatically read your card info from the camera but if it doesn’t work, you may enter it in manually.
- Accept your card’s terms and conditions.
- Once your card get authorized, you bank will send you a notification to inform you that Apple Pay is ready to use now.
- If you are an old Mac user, you will require your iPhone or Apple Watch to store your cards to pay for goods and services from your Mac.
- In order to do that, open “Settings” on your iPhone.
- Tap on the “Wallet & Apple Pay” option and then enable “Allow Payments on Mac.”

How to manage Apple Pay on your Mac?
After adding payment info on a Mac that supports Touch ID, you may add more detail from the “Wallet & Apple Pay” section of System Preferences, follow the below given steps to do that.
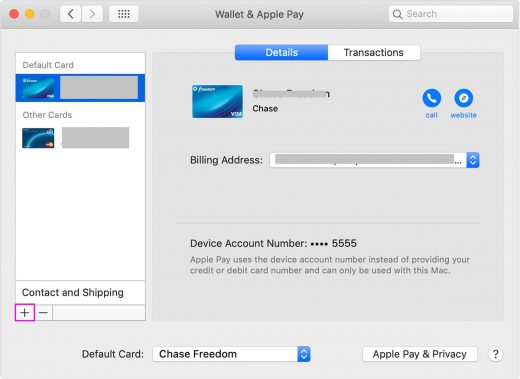
- Open “System Preferences” and then click the “Wallet & Apple Pay.”
- From here, you may view a card’s information such as your device account number, billing address, bank contact info and transactions by selecting them from the sidebar.
Now read: How to pay with Apple Pay in Safari on your Mac


What other's say