How to disable first sign in animation on your Windows 10 PC
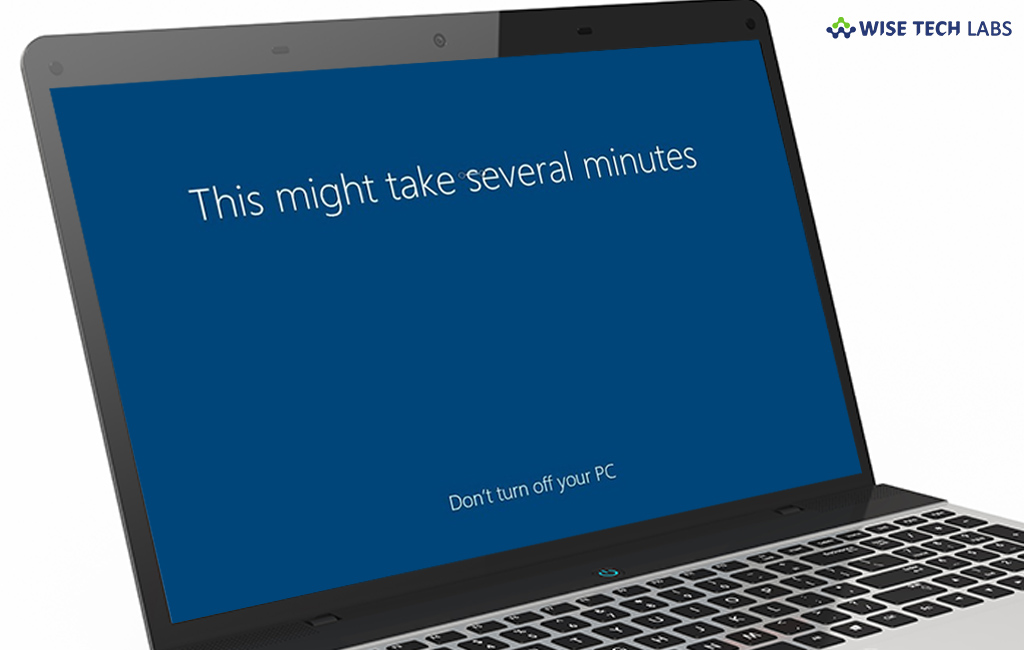
Whenever you sign for the first time of your Windows 10 PC, you are prompted with the “first sign-in animation” that includes several messages to get your PC configured. Usually, after finishing the setup on a new installation or upgrade, It gives you some prompts such as “Hi,” “We’re getting everything ready for you,” and “This might take several minutes”. If you are using Windows 10 PC or working as an IT administrator and want to get your PC configured more quickly, you may disable this first sign in animation to reduce the startup time. Here we, we will provide you some easy steps to do that.
To disable first sign-in animation using Group Policy Editor
If you are using Widows 10 Pro, you may easily disable first sign-in animation using Group Policy Editor by following the below given steps.
- Press “Windows key + R”keyboard shortcut to open the Run
- In the Run command Window, type “gpedit.msc” and click “OK” to open the “Local Group Policy Editor.”
- Follow the below given path:
Computer Configuration > Administrative Templates > System > Logon
- On the right side pane, double-click the “Show first sign-in animation”
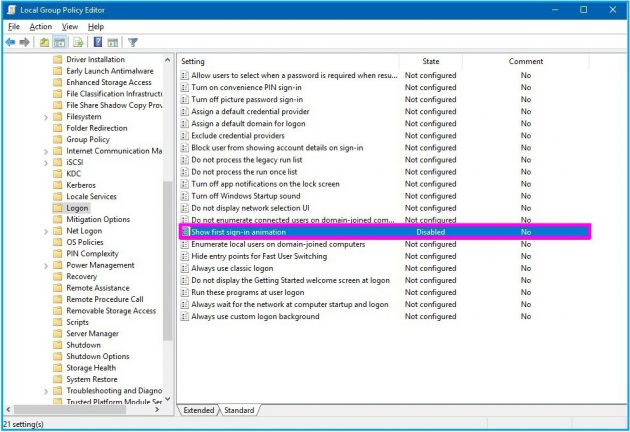
- Select “Disabled”, click “Apply” and then click “OK.”
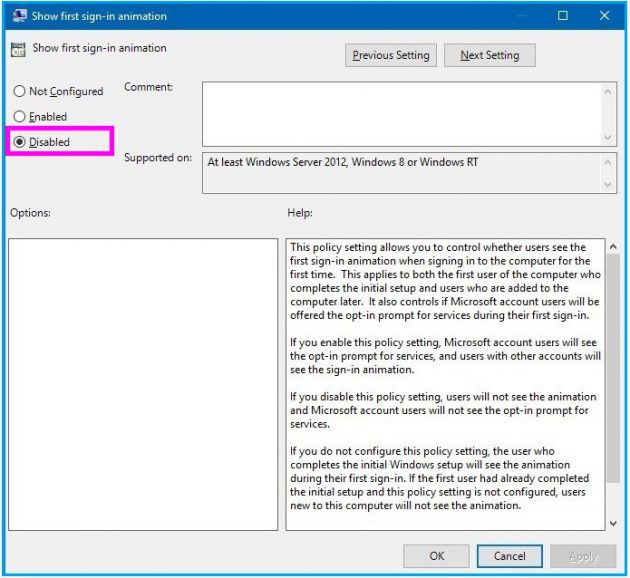
In case you want previous settings, follow the above given steps and select “Not Configured” in the last steps and then apply the settings.
To disable first sign-in animation using Registry Editor
If you are using Windows 10 home, you cannot disable first sign in animation using Local Policy Editor but you may do it by using Registry Editor.
Note: Before using Registry Editors, it is always recommended to back up your PC.
- Press “Windows key + R”keyboard shortcut to open the Run
- In the “Run Command Window” type “regedit”, and click “OK” to open the “Registry Editor.”
- Follow the below given path:
HKEY_LOCAL_MACHINE\SOFTWARE\Microsoft\Windows\CurrentVersion\Policies\System
- Then, right-click the “System” (folder) key and select “New.”
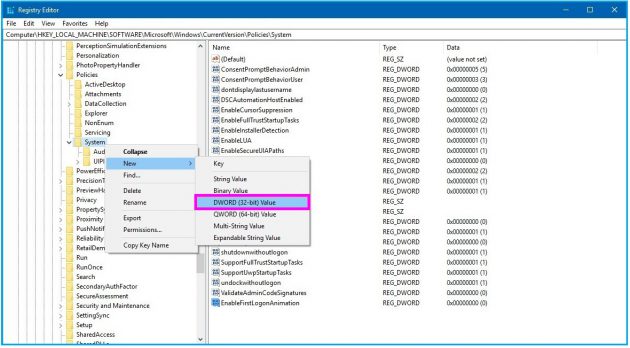
- Click on “Key”, name the key “EnableFirstLogonAnimation” and then hit “Enter.”
- Double-click the newly created DWORD, set its value to “0” and then click “OK.”
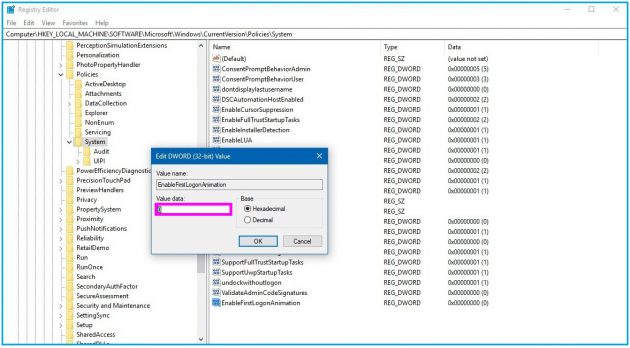
In case you want to revert the changes, you need to right-click the “EnableFirstLogonAnimation” DWORD and then select the “Delete” option.
By following the above given instructions, you may disable first sign in animation and access your account more quickly.
Now read: How to use Windows insiders program in Windows 10


What other's say