How to display Photo library as screensaver on your Mac

How to show Photo library as screensaver on your Mac?
All Mac users store their precious memories to Photo library. Over time, after storing files in deep folders on your Mac, you start forgetting those old memories. To keep you sweet memories live, you may set your Photo library as screensaver on your Mac. When you are signed into your Mac and not doing anything on it, you may turn its screen into a digital picture frame by using a screensaver that display your photos from Photo library. Here, we will provide you a short guide to set Photos library as screensaver on your Mac.
By following the below given steps you may easily use your Photos as screensaver on your Mac.
- On your Mac, click “Apple Menu” and select “System Preferences.”
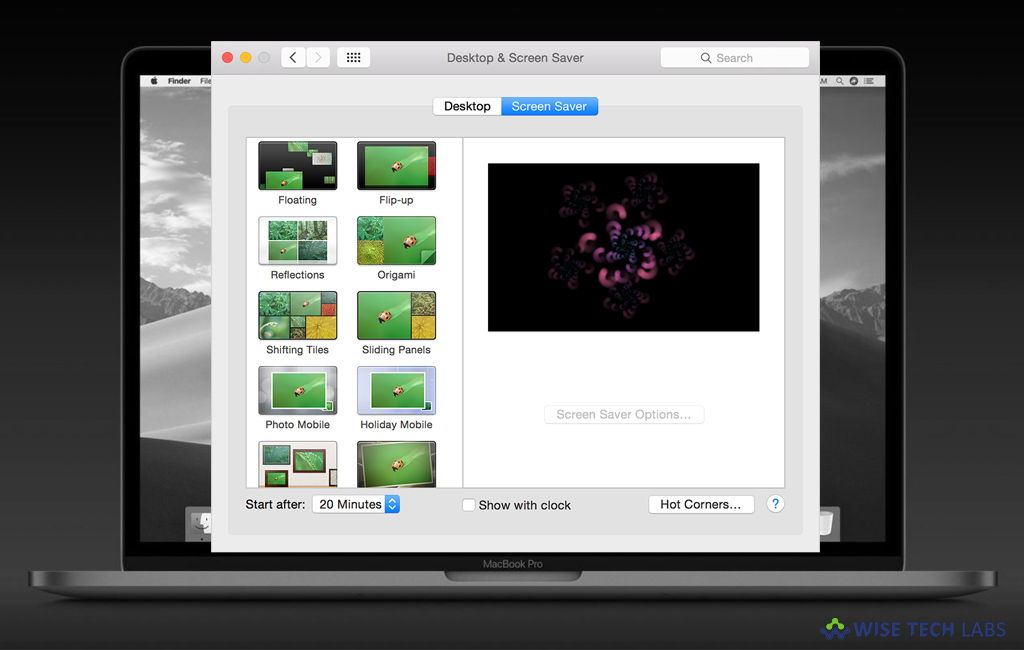
- Click “Desktop and Screen Saver preference” in the system preferences window.
- Switch to “Screen Saver” tab and select your favorite screen saver from the left side panel.

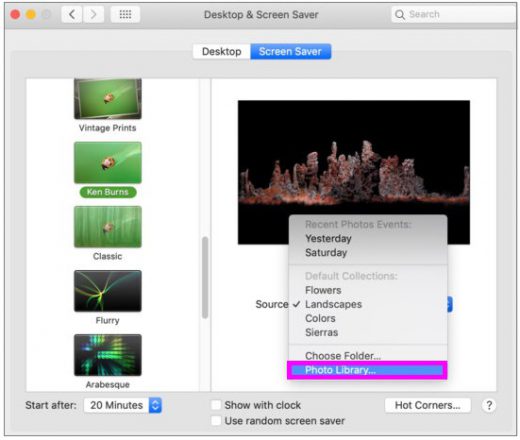
- On the right side of the dialog window, you will see a drop-down menu next to “Source”, click on it.
- From here, you may either select a recent photo event or select “Photo Library.”

- If you select Photo library, it may take some time to load all the images.
- Now, you may select Moment, Collection, Year, Face, Album or Shared iCloud album to use as screen saver. You may also select individual photos as screen saver for your Mac desktop.
- Check the “Shuffle Slide Order” box, if you want to automatically change screen saver among the selected photos in random order.
- To you want to set a time to start the screensaver, click the drop-down menu next to “Start after” and choose the time ranges from one minute to one hour.

- Click the “Preview” button to view the screensaver.
This is how you may live your old and sweet memories by display them as screensaver on your Mac screen.
Now read: How to use Dynamic desktop on Mac running macOS Mojave


What other's say