How to select import settings in iTunes on your Mac

Apple has a default music library, media player and internet radio broadcaster called iTunes. iTunes provides the best way to organize and enjoy music on your iOS device, Mac or Windows PC. Moreover, you may also purchase latest music files to enjoy them on your system or device. Apart from buying or managing songs in iTunes, you may also import songs into iTunes from CDs, convert audio files in encoding formats. By default, iTunes uses AAC (Advanced Audio Coding) format but you may change the format along with the import settings. If you are not aware of import settings and options in iTunes, here we will provide you a short guide that will help you to select import settings and options as per your requirement.
How to select import options in iTunes?
By selecting the import options, you may affect the song size and audio quality. Follow the below given steps, if you want to select import options in iTunes.
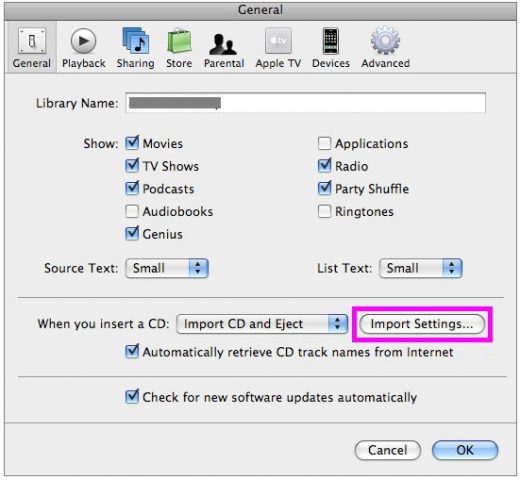
- On your Mac, open iTunes app, select iTunes>Preferences.
- Click “General” and then select “Import Settings.”

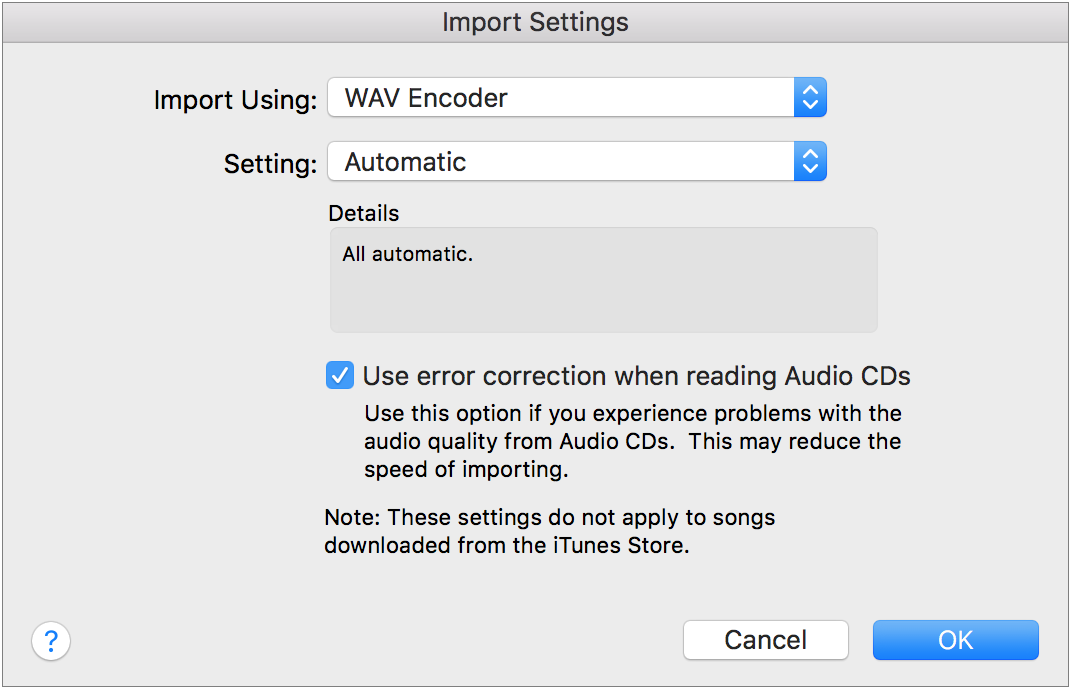
- From the import popup menu, select any of the below given encoding format:

AAC Encoder: You may select this format to listen songs using in iTunes, on iPhone and iPad, and on iPod models that come with a dock connector.
AIFF Encoder: You may select this format if you want to burn high-quality CDs with the songs you want to import with original audio quality.
Apple Lossless Encoder: You may use this format to listen imported songs on audiophile-quality sound systems without losing audio quality.
MP3 Encoder: You may select this format to listen music in apps other than iTunes or on MP3 players other than iPod, iPhone or iPad.
WAV Encoder: You may use this format to play your songs on a computer that does not have any MP3 software.
- After selecting the format, you may select the Choose a bit rate from the Setting pop-up menu. However, default settings work well in most cases. If you select MP3 Encoder, you may select one of the following:
Good Quality: You may select this to store more songs on a portable MP3 player with limited storage capacity.
High Quality: By selecting this option, you may play music in a noisy environment.
Higher Quality: You may select this option to create your own audio CDs or listen to your music with high-quality stereo speakers.
Custom: Select for greater control over the file size and sound quality.
- Select “Use error correction when reading Audio CDs” option, if needed.
How to use custom import settings in iTunes?
If you want to have a great control over the quality and size of imported files, you may use custom import settings by following the below given steps:
Note: Custom Settings cannot be used in case of Apple Lossless Encoder.
- On your Mac, open iTunes app, select iTunes>Preferences.
- Click “General” and then select “Import Settings.”
- From the import pop –up menu, select an encoding format.
- From the Settings pop-up menu, select “Custom” and then select the settings available for your encoding format that you selected.
Now read: How to get refund for items purchased from iTunes or App Store


What other's say