How to Hide Drives in Windows 10
Learn Different ways to hide Drives in Windows 10
If you are sharing your Windows 10 computer with others, you may be concerned about people accessing your personal data such as photos, videos on your Windows computer. To allow you to keep your secret files and folders hidden, Windows 10 is featured to hide specific drives. Windows 10 has some simple and easy Command prompts to hide specific drives on your computer. The easiest and fastest ways to hide specific drives are listed below.
1. Using Local Group Policy Editor
Local Group Policy Editor allows you to hide the drive from the File Explorer, and still be able to access its data. You may do it by following the below given instructions.
- Type “gpedit.msc” in the Run command window and enter it to open Local Group Policy Editor.

- Now, follow the below path to locate the File Explorer.
User Configuration/Administrative Templates/Windows Components/File Explorer
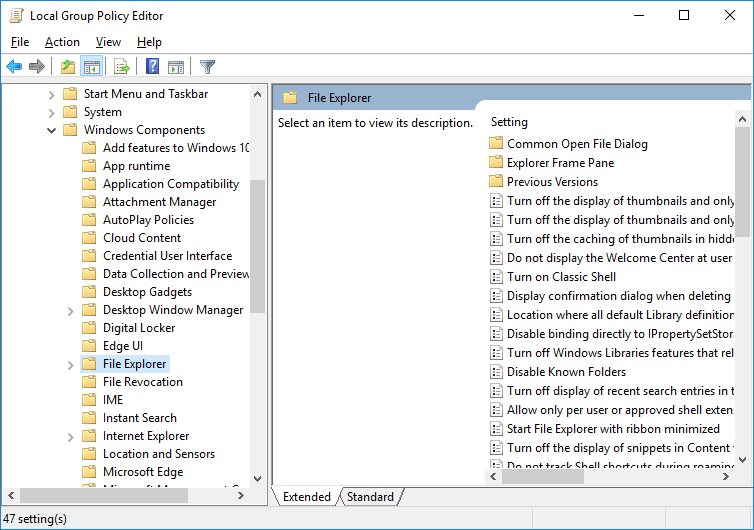
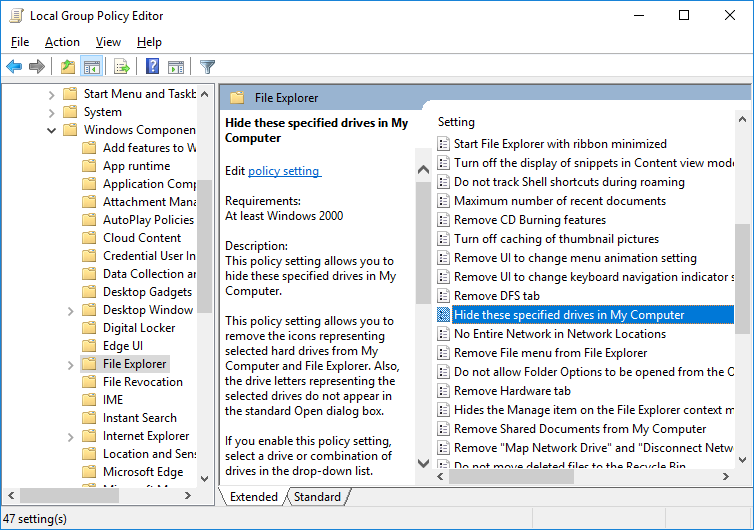
- Here, you can see the list of various settings. Double-click the on the “Hide these specified drives in My Computer”.
- From the window that pops up, change the configuration to “Enabled”
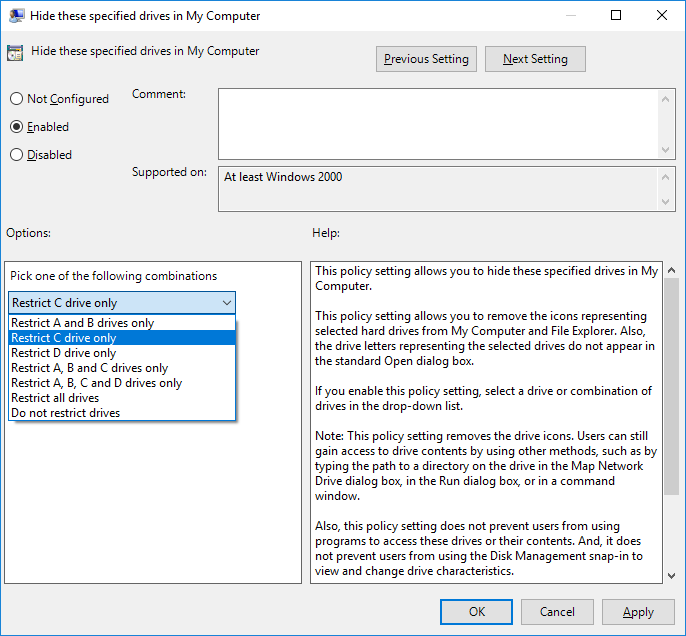
- At the same window select any option that you want from the drop-down menu of “Pick one of the following combinations”.
- Click on “OK” to save your changes.
Now, you will not be able to see that specific drive if you open your File Explorer.
Once drive is hidden, you can still access it by entering the path either in the Run command or in the address bar of your File Explorer and hit Enter.
Also you can back to previous settings by changing the configuration from “Enabled” to “Not configured” or “Disabled”.
2. Using Registry Editor
Registry Editor also hides the drive from the explorer but allows you to access the data using some specific path.
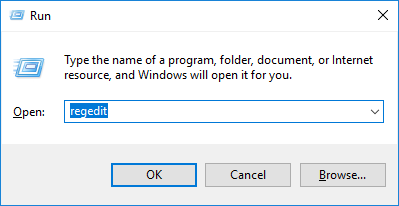
- Type “regedit” in the Run command window and hit enter to open Registry Editor.
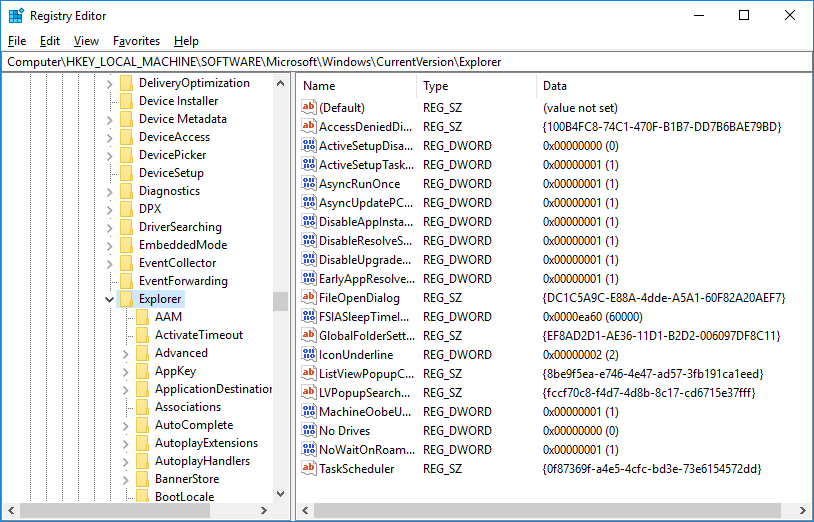
- Now, follow the below path to locate the explorer
HKEY_LOCAL_MACHINE\SOFTWARE\Microsoft\Windows\CurrentVersion\Explorer
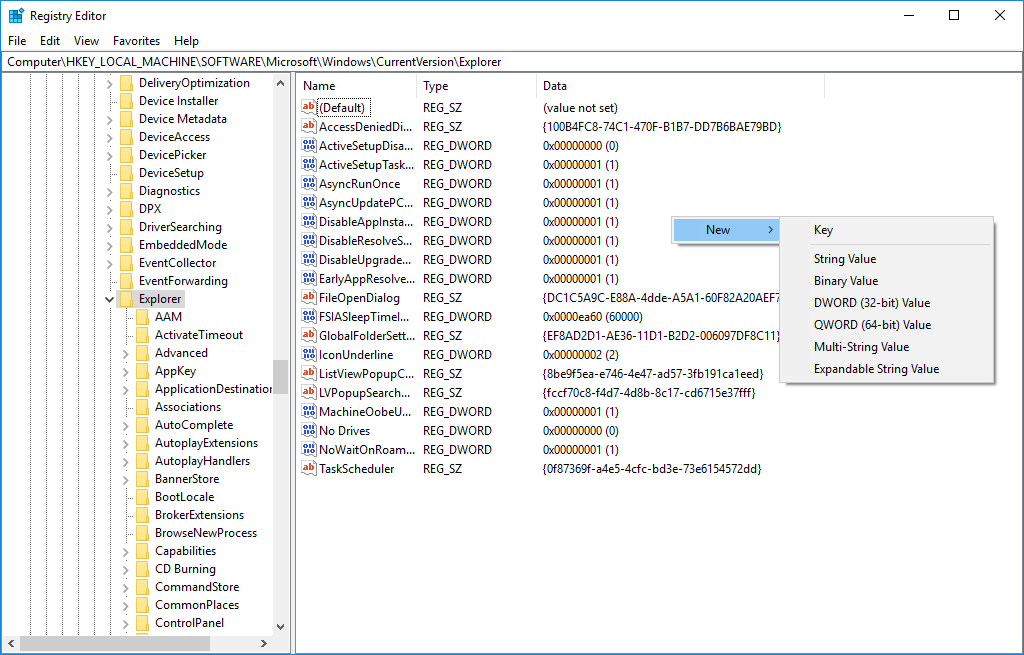
- Here, right-click anywhere on the white space of the Right Pane –> New –> DWORD (32-bit) Value.
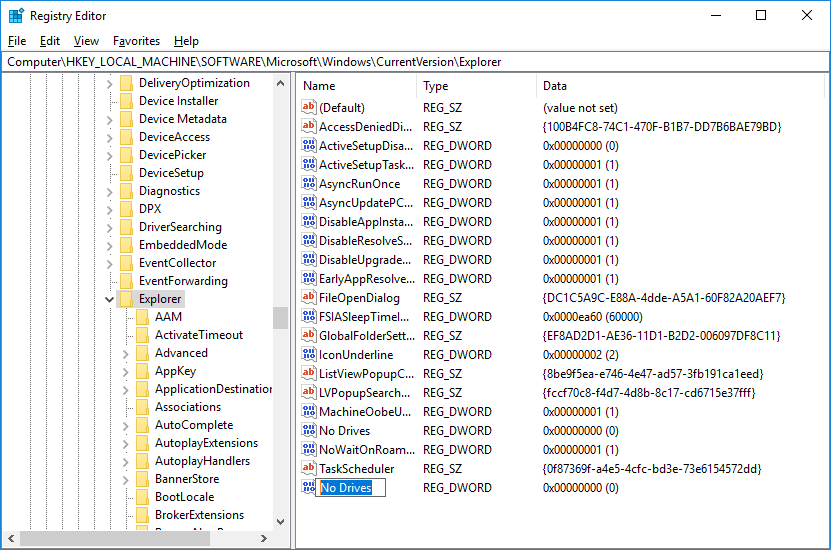
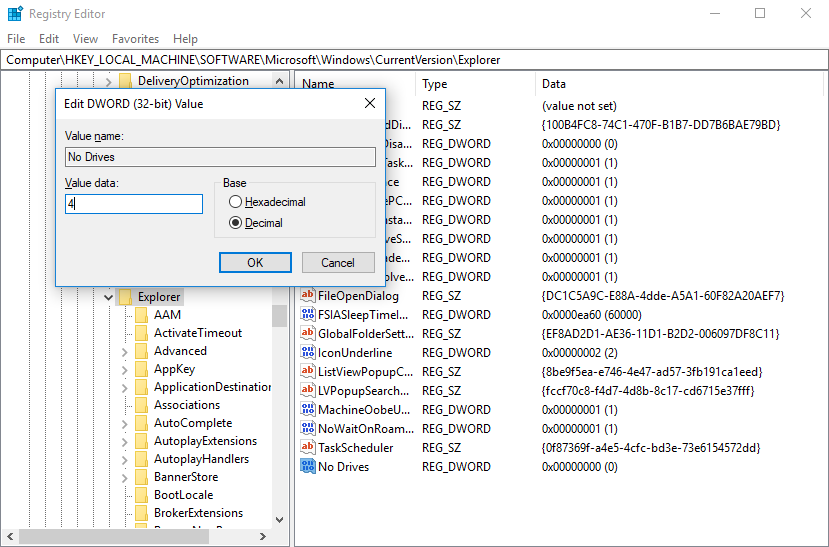
- You need to rename DWORD (32-bit) Value to “NoDrives” without the quotation marks.
- Now change the base to “Decimal” by double-clicking on this registry key. In the “Value data” input, enter the value corresponding to the drive’s path that you want to hide from the list below:
A: 1 G: 64 M: 4096 S: 262144 Y: 16777216
B: 2 H: 128 N: 8192 T: 524288 Z: 33554432
C: 4 I: 256 O: 16384 U: 1048576
D: 8 J: 512 P: 32768 V: 2097152
E: 16 K: 1024 Q: 65536 W: 4194304
F: 32 L: 2048 R: 131072 X: 8388608
You need to enter 67108863 to hide all your drives and enter the sum of the values corresponding in the table above to hide multiple drives but not all.
- Now hit “OK” and then restart your computer.
You may revert back to previous settings by changing the “Value data” to ‘0’ or deleting the registry key.
3. Using Disk Management
Using this way, you may hide the drives without giving any path to access the data from that specific hidden drive.
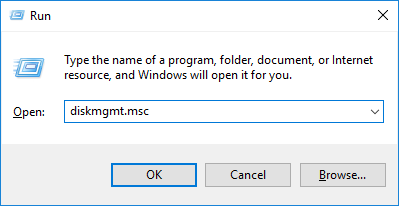
- Type “diskmgmt.msc” in the Run command Window and hit enter to open disk management.
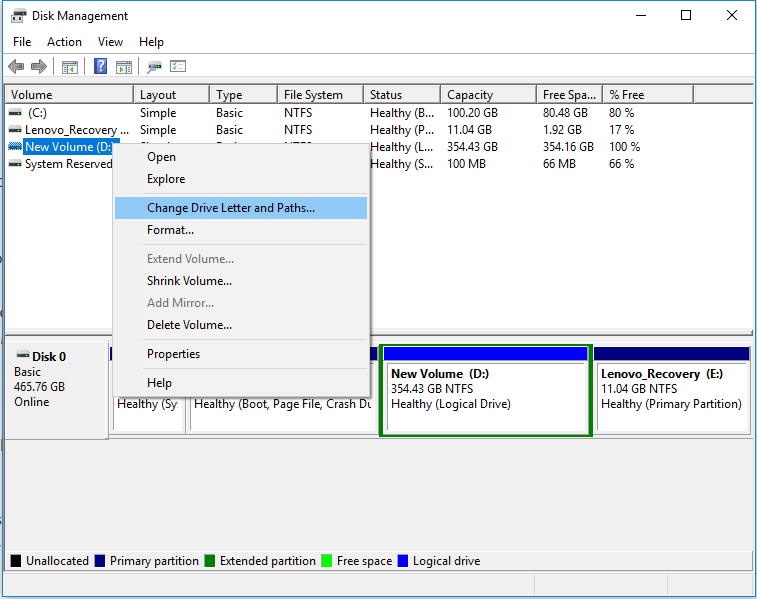
- Now you can see a list of all the disk drives that are present on your computer. Right-click on the desired drive to get its path and select “Change Drive Letter and Paths...”
- From the window appears, select “Remove” and hit “Yes”.
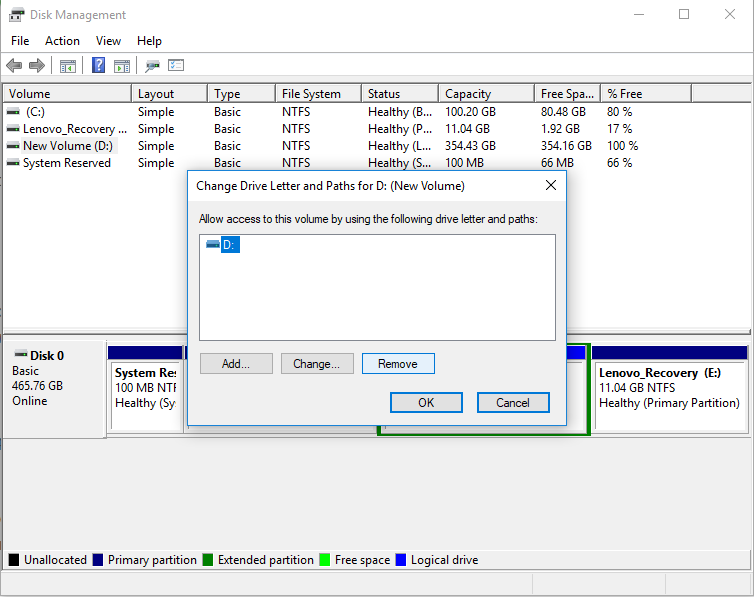
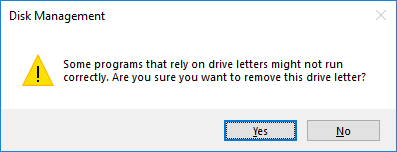
Now, you will get a partition without any path. It means no one can open or access your hard drives in explorer.
You may easily reverse your settings by selecting “Add” instead of selecting “Change Drive Letter and Paths...” and assign the same letter or even a different one if you want.
4. Using Command Prompt
This is the another way to hide all or specific hard drives from your computer without giving any path to access the data.
- Open the Command Prompt in Administrator mode.

- Type “Diskpart” in the Command Prompt window and hit enter to get changed your directory to “DISKPART”.

- Now type “List Volume” and hit Enter to see the disk partitions that are present on your computer.

- Then, type “Select Volume” followed by the number that is present against the drive that you want to remove the path for. You will get a confirmation message.

- Once you received the confirmation message, type “Remove Letter” followed by the letter of the drive. Again, you will get a confirmation message.
This way will provide an un-allotted drive. You may reverse your settings anytime by typing”Assign Letter”instead of“Remove Letter”followed by the letter you want to assign to that drive.
All the above ways will help you to hide your drives from others and keep your personal data completely secured.


What other's say