How to print your photos in Photos on your Mac

Photos app is one of the most essential features of macOS. With this feature you may easily manage your photos, libraries. With this app, you may print your own photos or order professional prints of your photos. You may print photos in several standard sizes, or select a custom size. Additionally, it allows you to print more than one photo per page using a contact sheet print format. If your printer has capabilities; you may print photos in black and white or in colour. Here we will provide you some easy steps to print your photos in Photos on your Mac.
How to print your own photos in Photos on Mac?
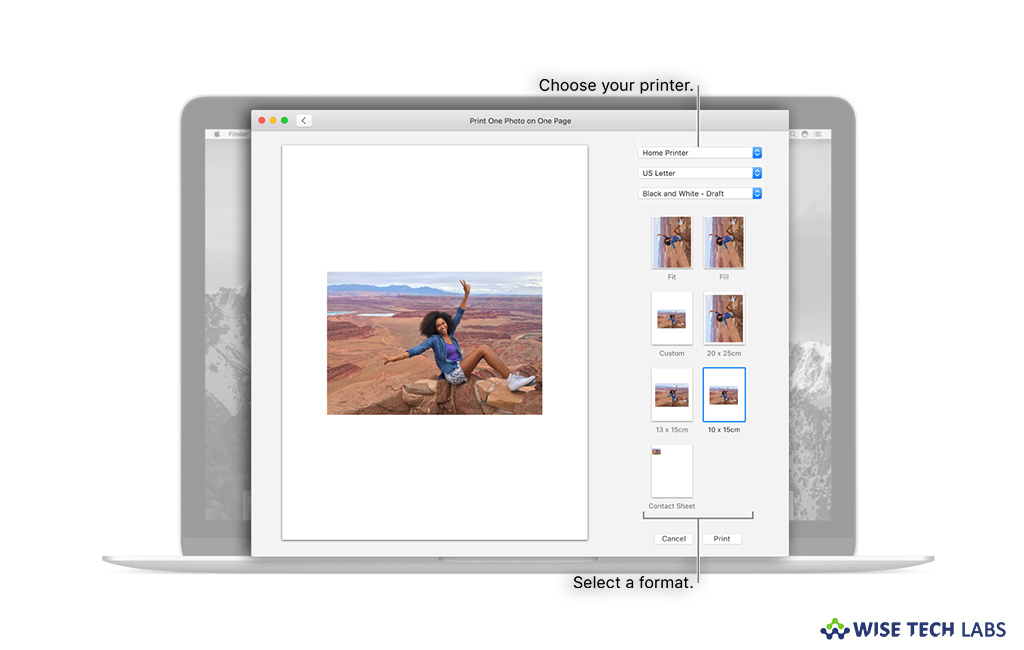
You may easily print your own photos by following the below given steps:
- In the Photos app on your Mac, click Photos in the sidebar and then select one or more photos.
- Select File > Print.
- In the print options, select a format from the list on the right side of the screen.

- On the left side, you may see the look your printed photos in the preview area.
- Moreover, you may custom and contact Sheet and resize the printed photos. Also use the other options for repositioning photos, choosing an aspect ratio or setting margins.
- Select a printer, select needed printer settings and then click “Print.”

- Mention print options in the Print dialogue and again click “Print.”
How to order professional prints of your photos in Photos on Mac?
If you want to order professional prints or your own photos, you may order them. Follow these steps:
- On your Mac, select one or more photos in Photos app.
- Select File > Create > Print and then select a print app.
- If you already have a print app and unable to see your app in the Print submenu, select File > Create > Other and then select the app you want.
- If the app is not there in the Other submenu, select File > Create > Manage and then check the box next to the app extension.
- Then, follow the onscreen instructions to order your prints.
Now read: How to print wirelessly from your iOS device using AirPrint


What other's say