How to change MAC Address in Windows 10

A Media Access Control (MAC) Address is an unique identifier assigned to a network interface controller for communications at the data link layer of a network division. Network Interface Card is required for every wired or wireless network to build network connectivity between your computer and other computers. Not only IP address but Mac address is also an essential part of internet connectivity that you access on your computer. Whenever you face network issue on your computer, you might check only the IP address configuration but sometimes MAC Address also needs changes to fix the network issues. Let’s learn how to change MAC address on your Windows 10 PC.
If you are unable to fix the issue by changing IP address, you change the MAC address on your Windows10 PC, follow the below given steps to do that:
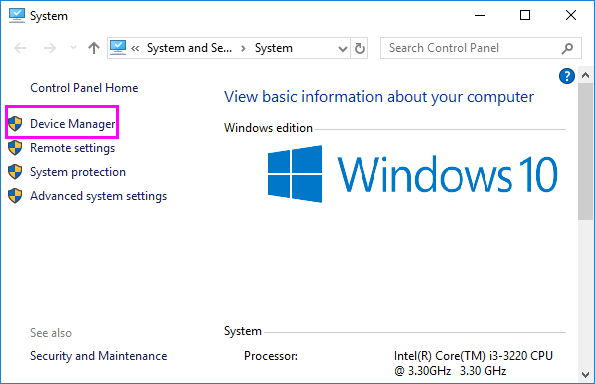
- Press “Windows Key + Pause key” to open System Properties window.
- In the left side of the System window, click “Device Manager.”

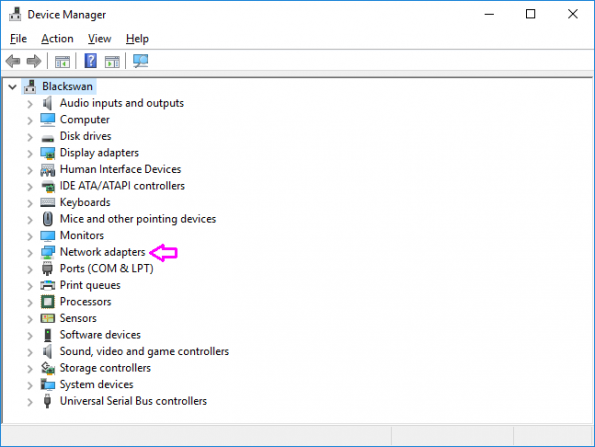
- Once the Device Manager dialog appears, look for the Network Adapters option.

- Then, click on the arrow sign preceding Network Adapters to see all the Network cards connected to your computer.
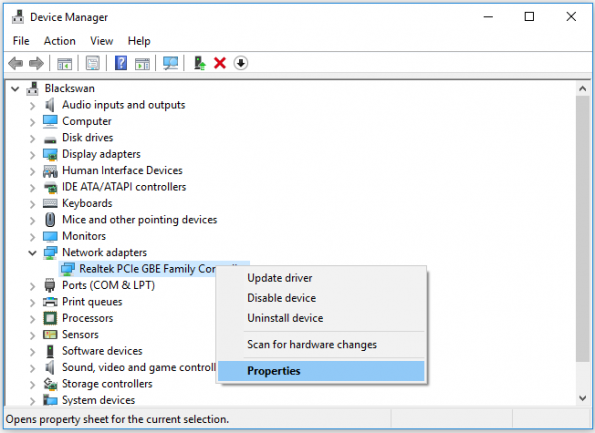
- Right click on the Network adapter for which you want to change the MAC address. and then select “Properties.”

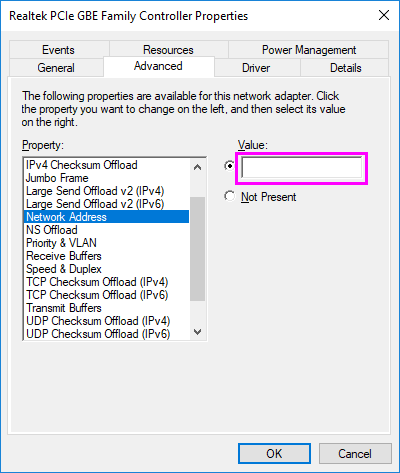
- Click on the “Advanced” tab.
- Here, you can see the list of available options, select Locally Administered MAC Address or Network Address.
Note: These are only two options that you may select for your network adaptor.
- After selecting one of the above options, you will get a text box below “Value.”
- Select the radio button and enter a six digit alphanumeric code in the Value field.

Note: you need to simply enter the code without any dashes or full colons, adding them may result in error.
- Click “OK” to close the dialog box and then close the “Device Manager.”


What other's say