How to change the default settings for new documents in Word for Mac

If you want to modify default settings for new documents in Word for Mac, you may easily change the default settings by making changes to the Normal template that new documents are based on. You may change the Normal template to modify its default layout or content so that any new document that you create will use the new settings. Additionally, if you mistakenly change the Normal template, you can easily restore the default configuration by deleting, renaming, or moving it. If you are wondering how to change the default settings for new documents in Word for Mac, let’s learn how to do it.
Before making any changes, you should always create a copy of any other template so that you may restore it, if anything goes wrong.
How to change the default font in Word for Mac?
Follow the below given steps to change the default font in Word for Mac:
- Open the template or document for which you want to change the default settings.
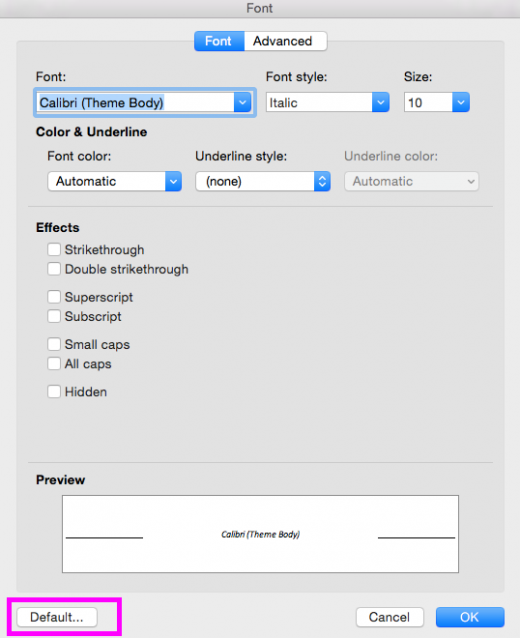
- On the “Format” menu, click “Font” and then switch to the “Font”
- Make the changes you want to do and then click “Default.”

How to change the default character spacing in Word for Mac?
If you want to change the default character spacing in any template that means you want change the settings for scale, position, spacing, kerning and other typographic features are used in every new document that is based on that template. Follow the below given steps to change the default character spacing in new documents.
- Open the template or document for which you want to change the default settings.
- On the “Format“menu, click “Font” and then switch to the “Advanced”

- Make the changes you want to do and then click “Default.”
How to change the default margins in Word for Mac?
If you want to change the default margins for every single document based on specific template, you may easily do it by following the below given steps:
- Open the template or document for which you want to change the default settings.
- On the “Format”menu, click “Document” and then switch to the “Margins.”

- Make the changes you want to do and then click “Default.”
How to Change the default layout in Word for Mac?
If you want to change section breaks, headers and footers, and other layout attributes in Word for Mac, you may change the default layout by following the below given steps:
- Open the template or document for which you want to change the default settings.
- On the “Format”menu, click “Document” and then switch to the “Layout”
- Make the changes you want to do and then click “Default.”
Now read: How to insert images to a header or footer in Microsoft Word 2016


What other's say