How to configure VPN settings on your Windows 10 PC
If you want to use a secured internet on your Windows 10 PC, a VPN connection helps you to provide a more secure connection to your office network and the Internet. Once your Windows 10 PC is connected to Virtual Private Network, your system gets secured from spy software and annoying ads. After connecting to VPN, you will not be distracted by unwanted ad and plug-in notifications while working on your PC. Before you can connect to a VPN, you must have a VPN profile on your PC. You may either create a VPN profile on your own or configure a work account to get a VPN profile from your company. Let’s learn how to create and connect to VPN in Windows 10.
To create a VPN profile in Windows 10
If you need a VPN profile for your office use, you need to look for VPN settings or a VPN app on your company’s intranet site when you are at work or contact your company’s support person to get assistance. For a personal use, open Microsoft Store to check if there’s an app for that service and then go to the VPN service’s website to check if the VPN connection settings to use are available there. Follow the below given steps to create a VPN profile on your Windows 10 PC.
- From the Start Menu, go to Settings>Network & Internet >VPN>Add a VPN connection.
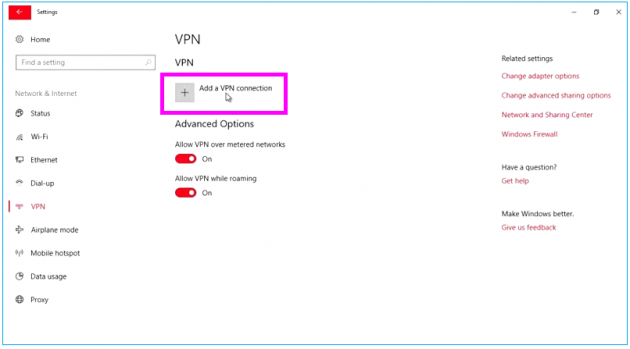
- In “Add a VPN connection”, configure the following settings:
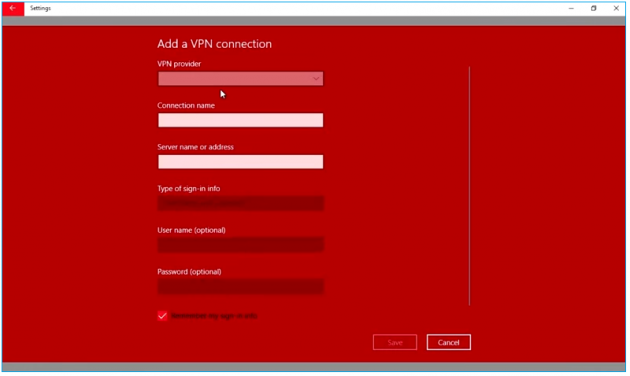
For VPN provider: Select “Windows (built-in).” In the Connection name box, enter a nick name for the VPN connection profile. This VPN connection name is required when you try to connect In the Server name or address box. Enter the address for the VPN server.
For VPN type: Select the type of VPN connection you want to set up. Here, you should need to know which kind of VPN connection your company or VPN service uses.
For Type of sign-in info: Select the type of sign-in info to use. This information might be a user name and password, one-time password, certificate or a smart card if you are connecting to a VPN for work. If you want you may type your user name and password in the respective boxes.
- After completing above settings, click “Save.”
- In case you need to edit the VPN connection info such as the proxy settings to use for the VPN connection, Select the VPN connection and then click “Advanced options.”
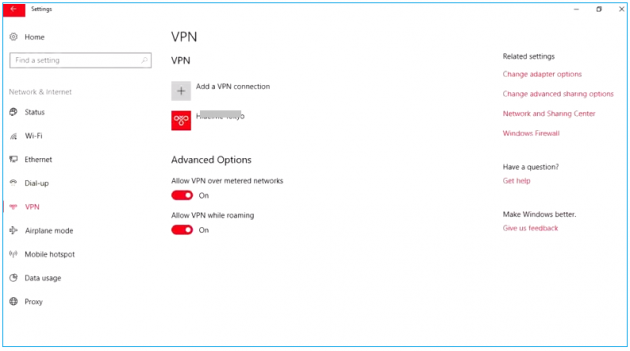
To connect to a VPN in Windows 10
After creating a VPN profile, you may easily connect to a VPN by following the below given steps:
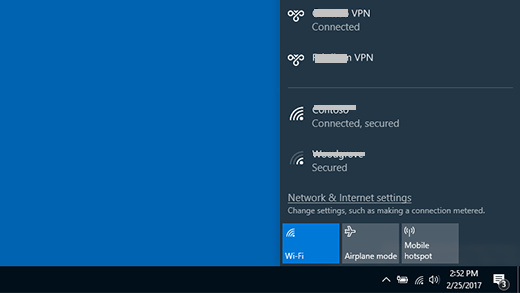
- On the right side of task bar, click on the “Network” icon.
- On the next window appears, choose the VPN connection you want to use.
- Here, if the “Connect” button is visible under the VPN connection, click “Connect.”
- If VPN in Settings opens, Click the VPN connection there and then click “Connect.”
- If you will be asked, enter your user name and password or other sign-in info. Once it is connected, you can see VPN connection name underneath it.
- You may crosscheck whether your system is connected to VPN or not by clicking on “Network” icon.
Now read: How to disable or enable network adapters on Windows 10


What other's say