How to connect your Windows 10 PC to a Wi-Fi network
Nowadays, most of us prefer to connect our computer, especially a laptop to a Wi-Fi connection. Wi-Fi network are virtually available everywhere and provides a simple way to connect with internet. Fortunately, Windows 10 avails some ways to connect with a Wi-Fi network. If you are setting up your Windows 10 PC or laptop and looking for the way to connect with a Wi-Fi connection, here we will provide you some way to connect to it.
You may easily connect your Windows PC with Wi-Fi network using the Taskbar, Settings app, Control Panel and Command Prompt.
To connect to a Wi-Fi network using Taskbar
This is the easiest and most direct way to connect with a Wi-Fi network, follow the below given steps to do that:
- In the bottom right corner of the taskbar, click on the “Wireless” If icon is not there, click the up arrow button on the left.
- Select the wireless network you want to connect to.
- Check the “Connect automatically”option, if you want to get connected automatically with available network.
- Click“Connect.”

- Enter the network password and click “Next.”
To connect to a Wi-Fi network using Control Panel
You may also connect to Wi-Fi network manually using network settings from control panel. Follow the below given steps to do that:
- From the start menu, open “Control Panel”and click “Network and Internet.”
- Click “Network and Sharing Center” and then click on the “Set up a new connection or network.”

- Select “Manually connect to a wireless network” and click “Next.”

- Enter the network SSID name and select the “Security type”from the drop down menu.

- Enter the network password.
- Check “Start this connection automatically”, click “Next” and then click “Close” button.
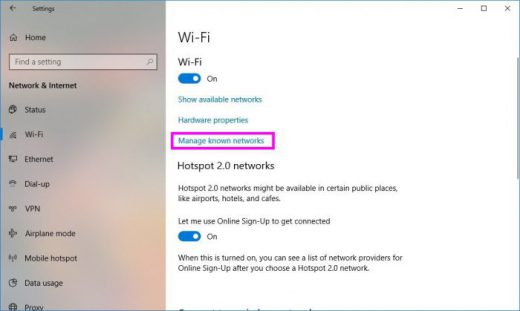
To connect to a Wi-Fi network using Settings
- In the start menu, click “Settings” and select “Network & Security.”
- Click “Wi-Fi” and then click on the “Manage known networks.”
- Click “Add a new network” and enter your network name.

- Select “Security type” from the drop down menu and then enter your network password.
- Check the “Connect automatically”option, if you want you may also check “Connect even if this network is not broadcasting” option and then click “Save.”
Now read: How to disable or enable network adapters on Windows 10


What other's say