How to connect your Xbox 360 console to Xbox Live using a Mac

If you don’t have a router to connect your Xbox 360 console to Xbox Live, you may also do it by sharing your Mac’s internet connection. All you need to do is just connect your connect your console to a Mac and then share your Mac’s Internet connection. In order to share the internet, make sure that your Mac has an Internet connection, an AirPort Card and an Ethernet port. If you are still wondering how to use a Mac instead of a router to connect your Xbox 360 console to Xbox Live, here is a step by step guide.
Step 1: Connect a network cable and enable Internet sharing
First off, you need to connect a network cable and enable internet sharing on your Mac, follow these steps:
- Plug one end of a network cable into the back of your Xbox 360 console and the other end into an Ethernet port on your Mac.
- On your Mac, select “Apple menu”,click “System Preferences”, and then click “Sharing.”

- Choose “Internet Sharing” and then choose “AirPort” from the “Share your connection from” section.
- Now, choose “Ethernet Adaptor (en2)” from the “To computers using.”
Step 2: Obtain the DNS server address for your Mac
Follow the below given steps to get the DNS server address for your Mac:
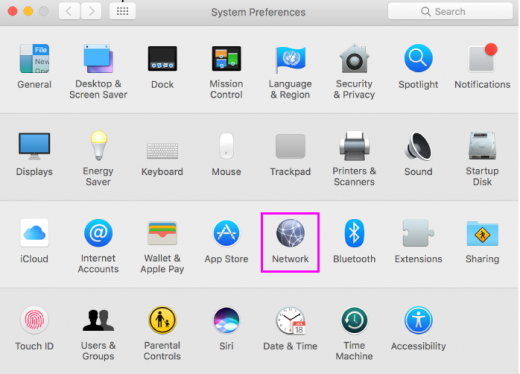
- On your Mac, choose “Apple menu”,click “System Preferences”, and then click “Network.”

- Choose “Wi-Fi”, click “DNS”, note down the list of numbers mentioned under “DNS servers” section and then click “OK.”
- Choose “Ethernet”, click “TCP/IP” and then turn “Configure IPv4” off.
- Click “Apply” to save the changes.
Step 3: Configure the network settings on your Xbox 360 console
Finally, you need to set the network settings on your Xbox 360 console:
- Hit the Guidebutton on your controller, head to “Settings” and choose “System Settings.”
- Choose “Network Settings.”
- If you are asked, choose “Wired Network.”
- Choose “Configure Network” and then select “IP Settings” in the the “Basic Settings”tab
- Choose “Manual” and then select “IP Address.”
- Now, enter 192.168.2.2, and then select “Done.”
- Choose“Subnet Mask” to enter 255.255.255.0 and then select “Done.”
- Choose “Gateway” to enter 192.168.2.1 and select “Done.”
- Choose “DNS Settings” from the “Basic Settings” tab.
- Choose “Manual” and select “Primary DNS Server” option.
- Now, enter the number that you noted in Step 2 and then select “Done.”
- Choose“Done” again, hit “B” on your controller and then select “Test Xbox Live Connection.”
After completing the above given steps, your console may now share the Internet connection that your Mac is using. And it connects to Xbox Live.
Now read: How to stream games and Live TV from your Xbox console
If you are looking for a Mac Maintenance Application, Check out Wise Mac Care. Wise Mac Care is your one-stop Mac maintenance application that can remove several types of junk files and can optimize Mac’s hard drive to boost your Mac to the peak performance for FREE. Wise Mac Care will also help protect your privacy and safeguard your activities from prying eyes.


What other's say