How to forward Gmail messages to another account automatically
Gmail is one of the highly used email platforms globally. It has a very simple and facile interface that offers excellent management, archiving, and search capabilities. It has many advanced features, one such feature that you may not be aware of is automatic forwarding of emails to another account. Let’s learn how to enable automatic email forwarding feature on your Gmail account, below are some easy steps to do that.
To enable automatic forwarding
- On your PC, open Gmail using the account you want to forward messages from. Messages can be forwarded only on one email address.
- Click “cog icon” in the top right corner of screen and select “Settings” from the drop down menu.

- Select the “Forwarding and POP/IMAP.”

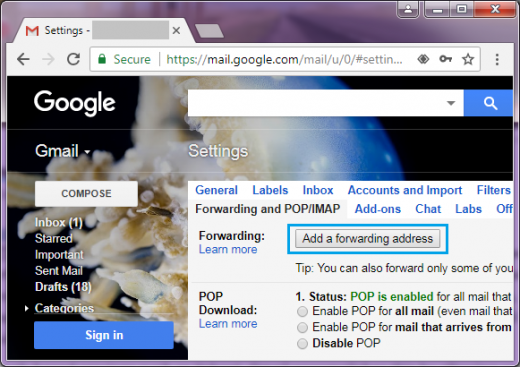
- In the “Forwarding” section, you need to click “Add a forwarding address.”
- Enter the email address you want to forward messages to.
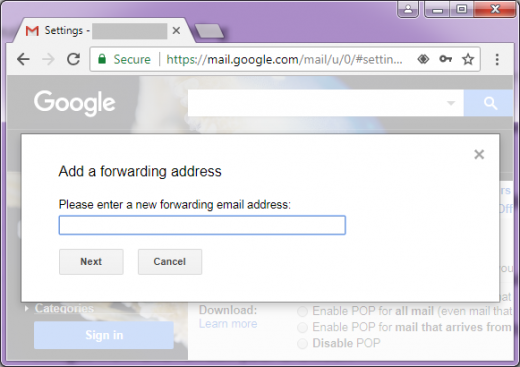
- Click “Next” and “Proceed” to complete the process.
- Once done, a verification message will be sent to that email address. Click on that link.
- Go back to the settings page for the Gmail account you want to forward messages from and refresh your browser.
- Select “Forward a copy of incoming mail to” and select what you want to do with the Gmail copy of your emails. We suggest you to keep Gmail’s copy in the Inbox.
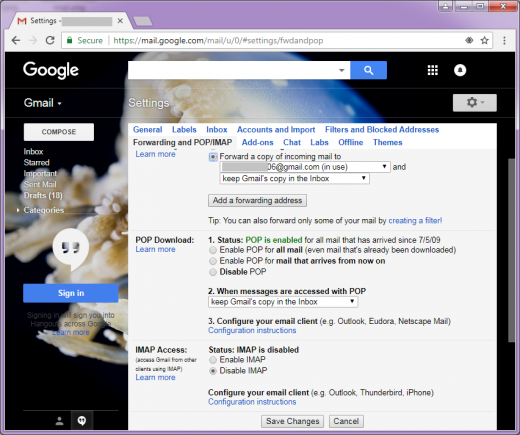
- Click “Save Changes” at the bottom of the page.
To disable automatic forwarding
- On your PC, open Gmail using the account you want to forward messages from. Messages can be forwarded only on one email address.
- Click “cog icon” in the top right corner of screen and select “Settings” from the drop down menu.
- Select the “Forwarding and POP/IMAP”
- Click “Disable forwarding” in the “Forwarding” section.
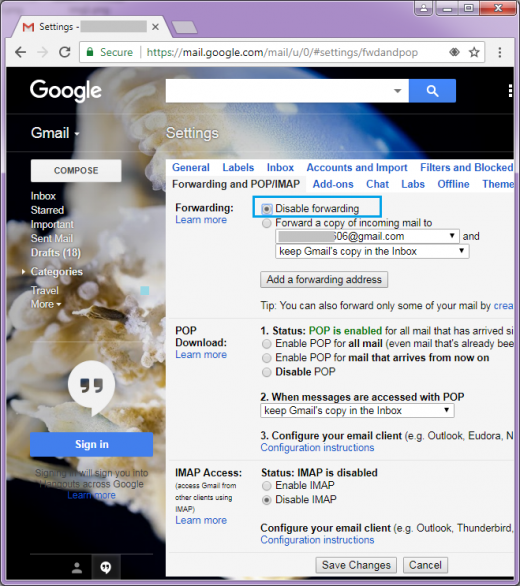
- Click “Save Changes” at the bottom.
This is how you may easily enable or disable automatic email forwarding feature on your Gmail account.


What other's say