How to change network priority on your Windows 10 PC

When you have both Ethernet and Wi-Fi network on your system, usually it automatically gets connect to Ethernet. It happens because of the automatic network priority assigned by Windows to all its network adapters; however, it is good. But what if you want to connect your system to a specific network, you may now easily force your system to get connected with a specific network by disabling the other network adapter. If you are wondering how to force one network connection over the other, here is a short user guide that will help you to change network priority on your Windows 10 PC.
You may change network priority using Settings app or PowerShell Command. Let’s learn how to do that.
How to change network priority using Settings App?
You may easily change network priority using Settings App, follow these settings:
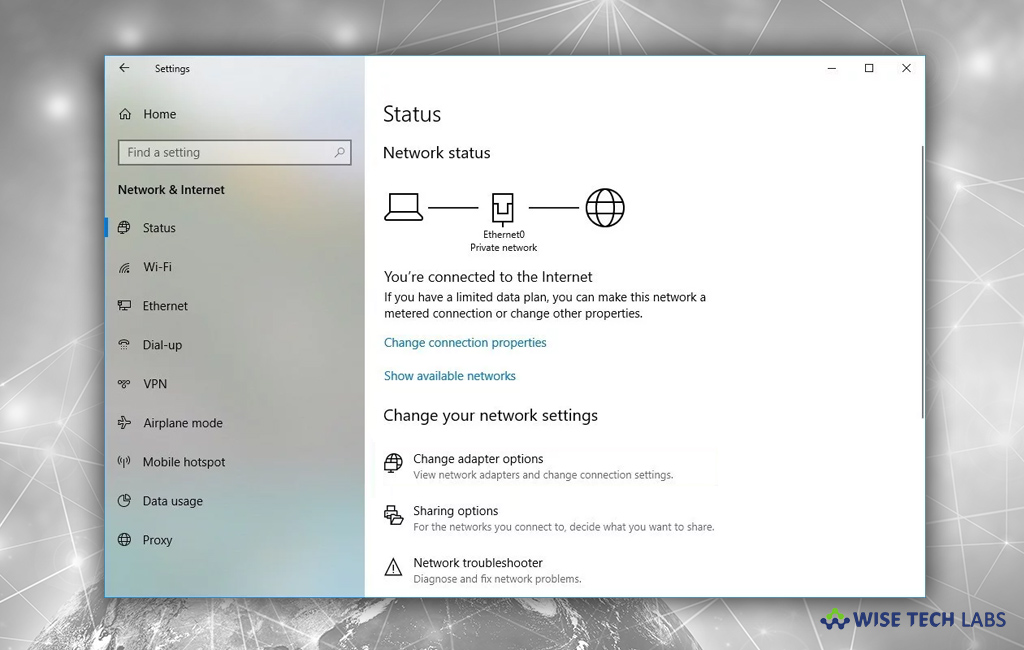
- On your Windows 10 PC, open the Settings app, go to Network and Internet > Status and then click Change Adapter Options in the right-side pane.
- On the network adapter page appears in the control panel, locate the network adapter you want to set the priority for, right-click on it, and then select the “Properties” option.
- In the properties window, select the Internet Protocol Version 4 (TCP/IPv4) option, and then click “Properties” button.
- If the network priority option is hidden under the advanced settings. Click “Advanced” button, uncheck the “Automatic Metric” option, and then enter a number below 10.

- Click OK, close all other Windows and restart the PC to apply the changes.
How to change network priority using PowerShell Command?
You may also change network priority using PowerShell Command, follow these steps:
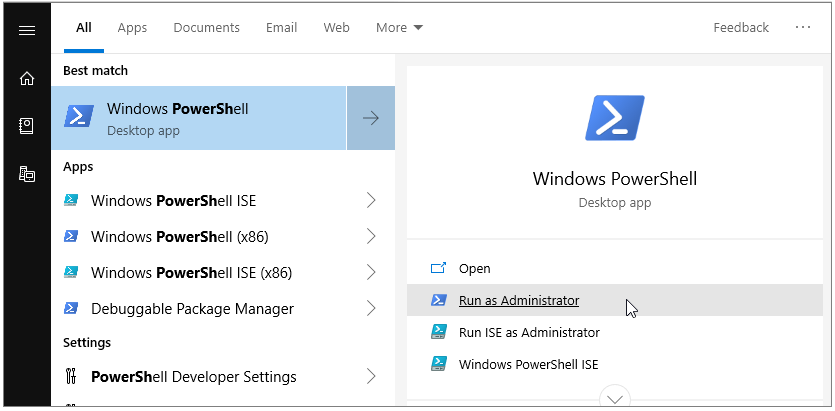
- On your Windows 10 PC, search for PowerShell in the Start Menu, right click the top result and select Run as administrator.

- Now, execute the below given command for finding the interface index of your target network adapter. You may find the interface index number under the ifIndex section. Make a note of your adapter’s interface index number.
Get-NetIPInterface
- Now, execute the below given command where replace the INTERFACE_INDEX with the actual interface index number and PRIORITY with the actual priority number that should be equal to or below 10.
Set-NetIPInterface -InterfaceIndex INTERFACE_INDEX -InterfaceMetric PRIORITY
- Finally, restart your system to apply the changes.
Now read: How to hide certain pages in settings app on Windows 10


What other's say