How to change the DNS settings on your iPhone or iPad

How to change DNS server on your iPhone or iPad ?
DNS settings are required on your iPhone or iPad to use the specific Wi-Fi network; it is quite easy to configure. Normally, the Wi-Fi network that you select on your iPhone automatically sets the DNS server configuration. But if you want to customize the DNS settings for several Wi-Fi networks, you may change them easily. Let’s learn how to configure the DNS settings on iPhone or iPad.
Follow the following steps to change the DNS settings:
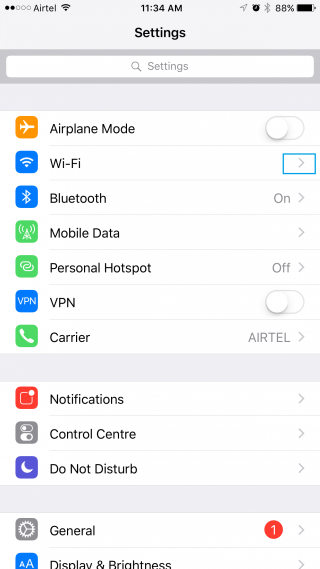
- Open “Settings” on your iPhone.

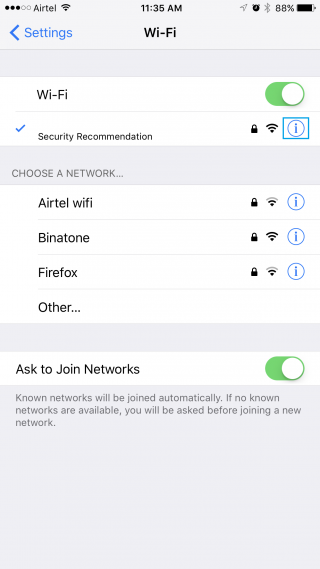
- Tap on Wi-Fi. If it’s switched off, turn Wi-Fi on.
- Select a Wi-Fi network and tap on the blue “i” button next to the Wi-Fi network you are currently connected to at the top of the screen.

- Scroll down on the information screen to “Renew Lease” section.
- Tap the “Manual” option at bottom of the screen.

- Tap the “Server” and then type the IP address of each DNS server you want to use as per their line.

- after completing this , tap on back button to save the changes automatically. Similarly, you may set DNS server for every Wi-Fi network which you want to use.
Once you configured the DNS settings, your iPhone or iPad remembers these settings until you click on “Forgot the network”.
You may also use free DNS services like Google: 8.8.8.8, 8.8.4.4 and Open DNS: 208.67.222.222, 208.67.220.220 in the DNS field.


What other's say