How to disable Game Bar and Game DVR in your Windows 10 PC

Earlier, Game Bar and Game DVR were the part of the Xbox app but now these are also added in Windows 10. Microsoft added this feature in Windows 10 to automatically record video of your PC game play in the background with background recording and save this video to a file when you select. With this feature, you may capture the screen’s contents, record your game play and save it as a video, take screenshots and so on. However, it is a good option to record all your plays on Windows 10 but some users find it very annoying. If you are not happy with Game Bar and Game DVR, you may disable Game Bar and Game DVR On your Windows 10 PC. Let’s learn how to do that.
How to disable Game Bar and Game DVR from Settings app?
By following the below given steps, you may disable Game Bar and Game DVR in your Windows 10 PC:
- On your Windows 10 PC, right click the “Start button” and click “Settings.”
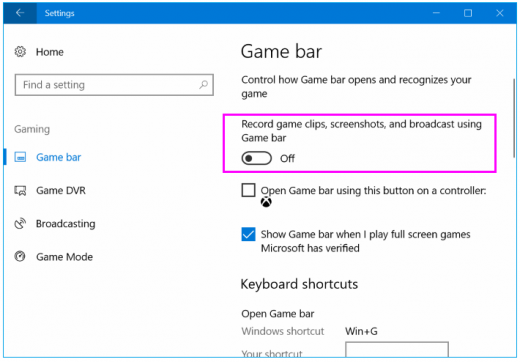
- Select “Gaming” and then click “Game Bar.”
- Now disable the button below “Record game clips, Screenshots and broadcast using Game Bar.”

- To disable “Game DVR”, click Game DVR.
- Turn off the button below the “Record in the background while I’m playing a game” option.
How to disable Game DVR from Xbox app?
Moreover, you may also disable Game DVR from Xbox app, follow the below given steps to do that:
- On your Windows 10 PC, launch Xbox app and Sign in using your Microsoft account to modify the app’s settings.
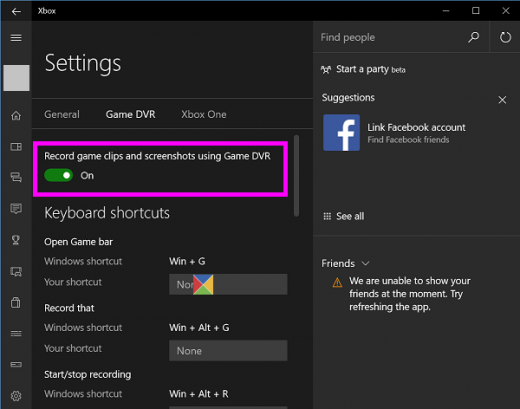
- In the Xbox app, click the cog icon in the bottom left side of the Settings page.
- Now switch from “General” tab to Game DVR tab.
- Disable the button below the “Record game clips and screenshots using Game DVR” option.

This is how you may disable Game Bar, Game DVR and some of the features, associated with them that might be affecting your system performance.
Now read: How to enable or disable Game Mode in Windows 10


What other's say