How to create email aliases in iCloud Mail on your Mac

An email alias is simply a forwarding email address that hides your actual email address from a recipient. With alias email address, you may also manage the emails you receive, and monitor the sources of unwanted messages. You may both send and receive email from an email alias using Mail on iCloud.com. With iCloud Mail, you may have up to three active email addresses, and you may disable or enable them at any time. Besides this, you may also delete email aliases that you no longer want to use. When an alias is disabled or deleted, email sent to that alias is returned to the sender. If you are wondering how to create, use and manage email aliases in iCloud Mail, here is a step by step guideline that helps you in it.
How to create an email alias in iCloud Mail?
You may easily create an email alias in iCloud Mail, follow these steps:
- Open iCloud Mail, click the Action pop-up menu (Cog icon) in the sidebar and then select “Preferences.”
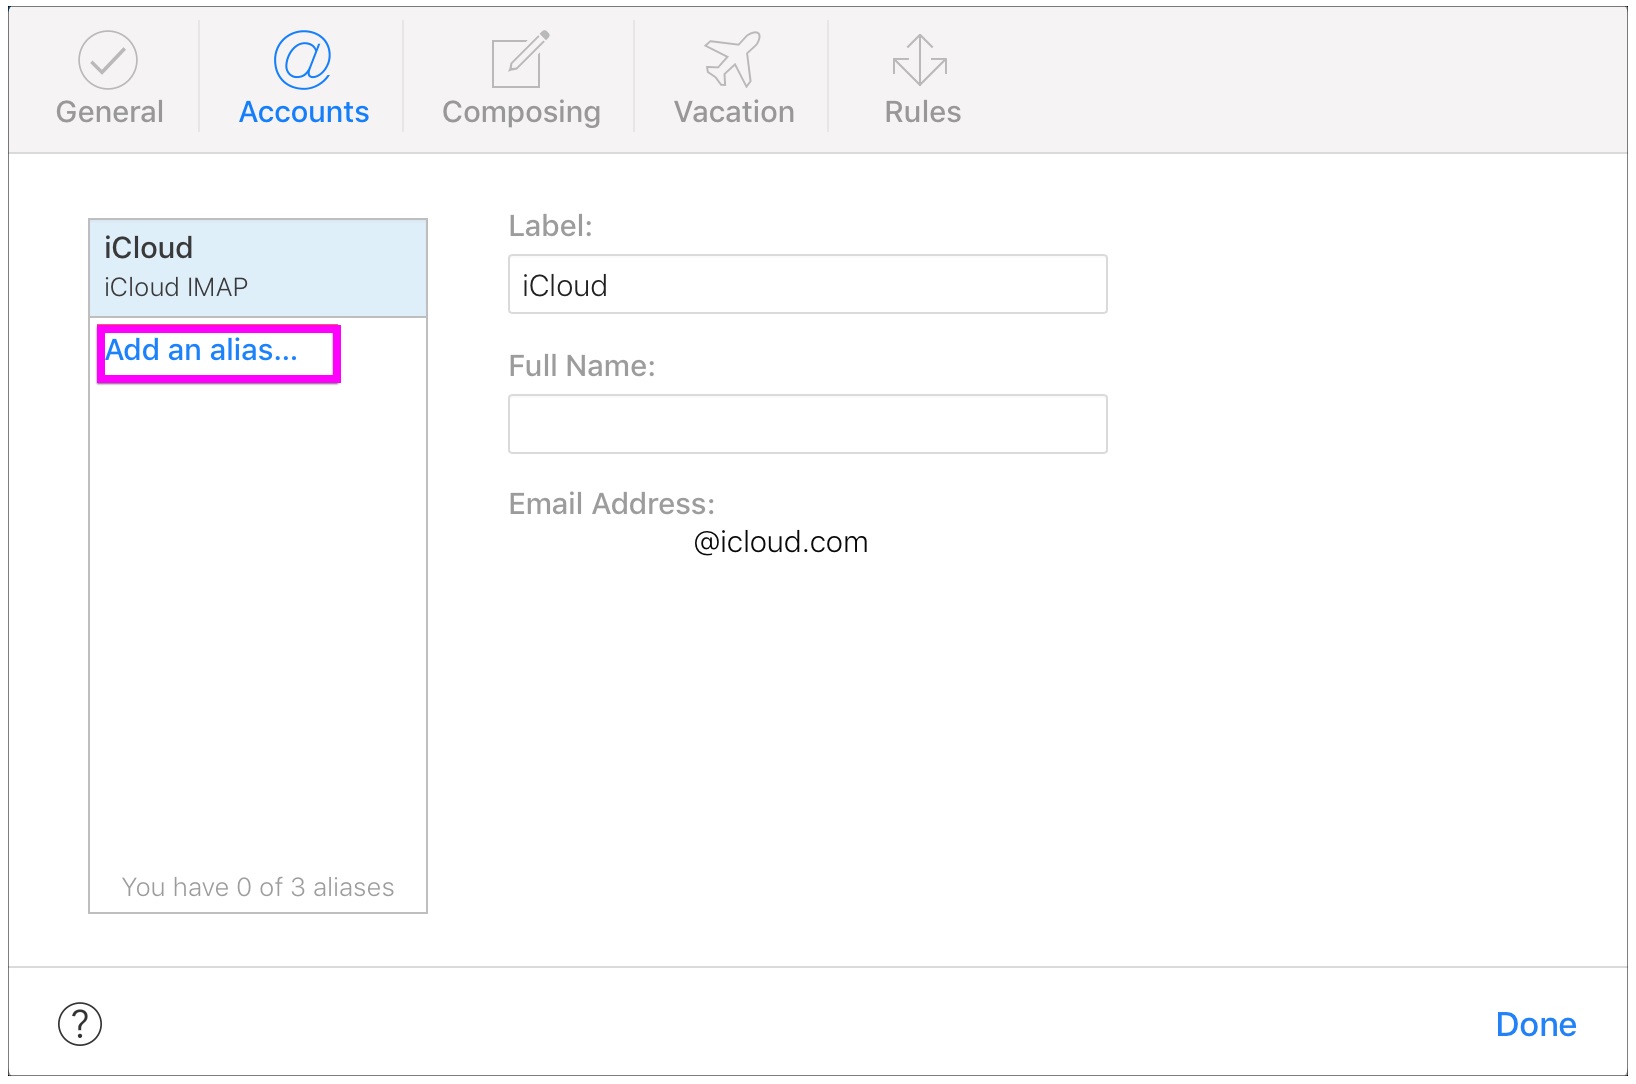
- Click the “Accounts” option and then select “Add an alias.”

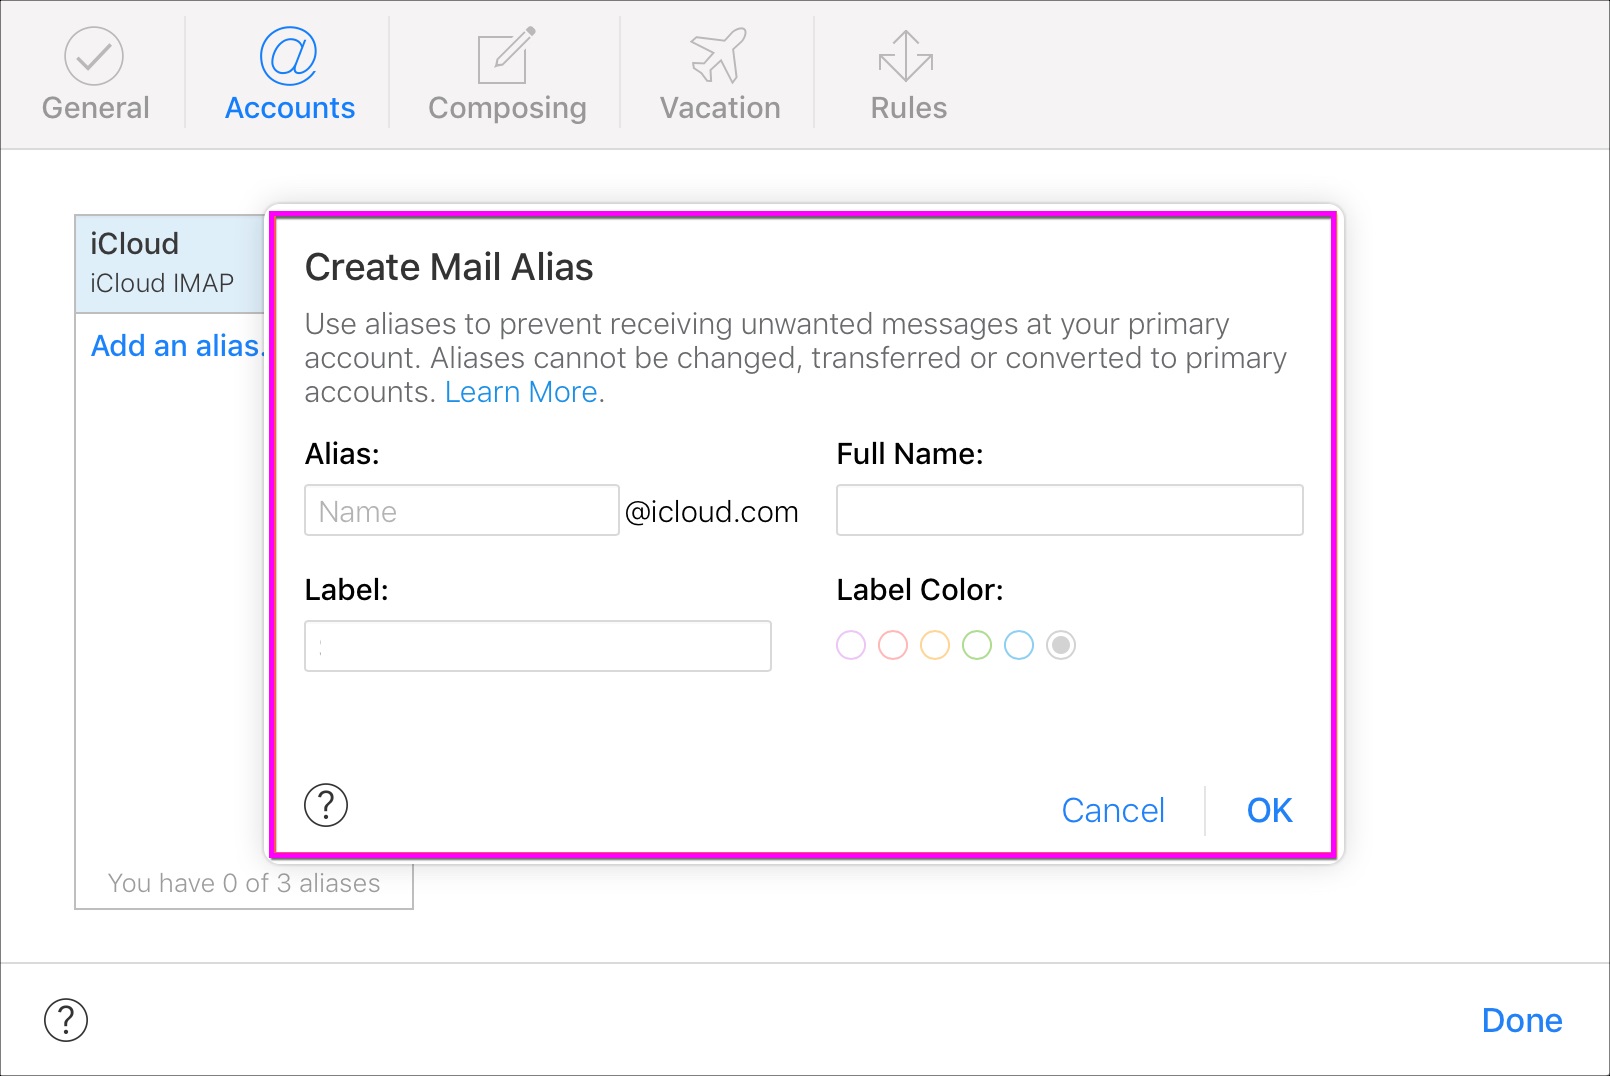
- Now, enter the requested information:

- Alias: Enter texts to create alias email address. An alias email address must have between 3 and 20 characters.
- Full Name: Enter the name that appears in the “From field” of the messages you send.
- Label: iCloud Mail uses the label to categorize emails sent to the alias.
- Label Color: Emails sent to the alias appear in your Inbox with the colored label that you specify. You may see Alias labels only in Mail on iCloud.com.
- Finally, click “OK” and then click “Done.”
How to change, turn off, turn on, or delete an alias in iCloud Mail?
If you want to manage alias email address in iCloud Mail, follow these steps:
- Open iCloud Mail, click the Action pop-up menu (Cog icon) in the sidebar and then select “Preferences.”
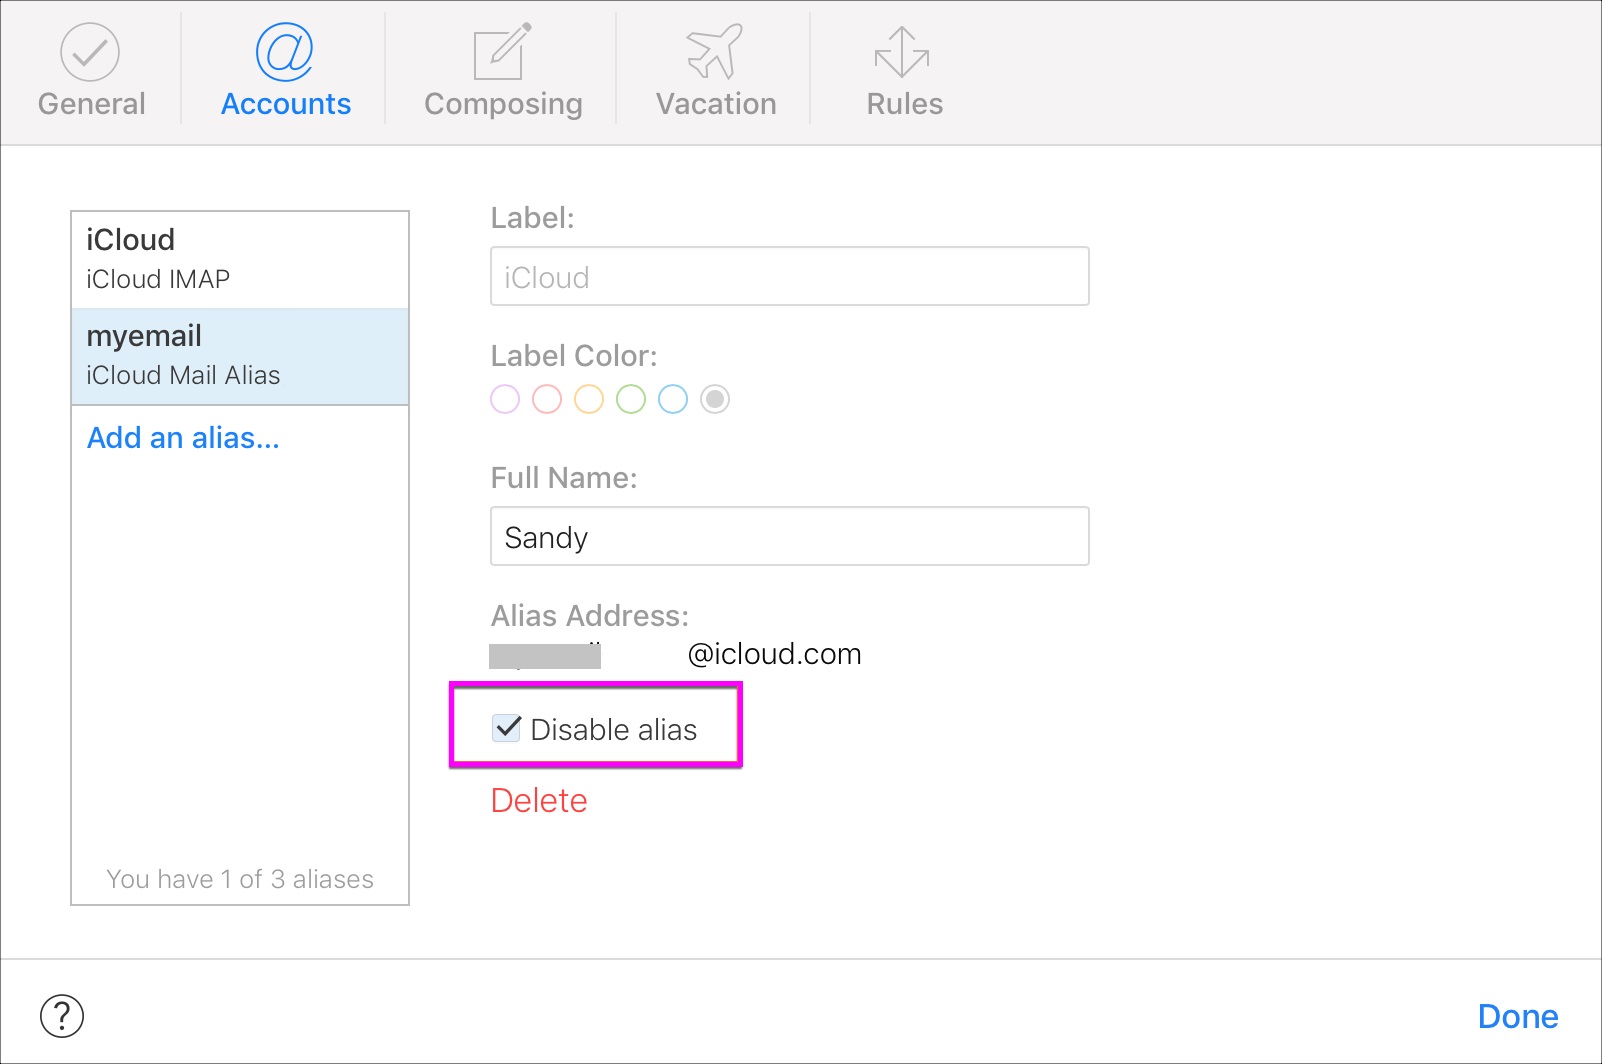
- Click “Accounts”, select the alias in the Addresses list and then do any of the following:

- To modify the name or label: You need to a new alias name and label in the fields provided. An alias email address must have between 3 and 20 characters.
- To select a new color for incoming messages: Click a Label Color option. Alias labels are visible only in Mail on iCloud.com.
- To disable an alias: Select “Disable alias.”
- To enable an alias: Deselect “Disable alias.”
- Delete an alias: Click “Delete.”
- Finally, click “Done” to save the changes.
Now read: How to access iCloud email using web browser
If you are looking for a Mac Maintenance Application, Check out Wise Mac Care. Wise Mac Care is your one-stop Mac maintenance application that can remove several types of junk files and can optimize Mac’s hard drive to boost your Mac to the peak performance for FREE. Wise Mac Care will also help protect your privacy and safeguard your activities from prying eyes.


What other's say