How to deauthorize your computer using iTunes

If you are planning to sell your computer or sending for repairing, you may deauthorize your computer to prevent it against unauthorized access. Once your computer is deauthorized, you may remove its access to certain content that you purchased from the iTunes Store, iBooks Store or App Store. The content includes music, movies, TV shows, apps and books. Deauthorizing of computer will not delete your content from the computer. When you deauthorize a computer, you only prevent it from accessing protected content that you stored on your computer. If you are wondering how to deauthorize your computer before giving it away or sending for major upgrades, here we will provide you a short guide that will help you to do that.
How to see the number of computers you have authorized?
If you want to see how many computers you have authorized, follow the below given steps to do that:
- Open “iTunes” on your computer.
- If you are not already signed in, sign in with your Apple ID.
- Select Account > View My Account from the menu bar at the top of your computer screen or at the top of the iTunes window.
- Now enter your password and then press the “Return” or “Enter key” on your keyboard, or click “View Account” doing so will take you to the Account Information page.
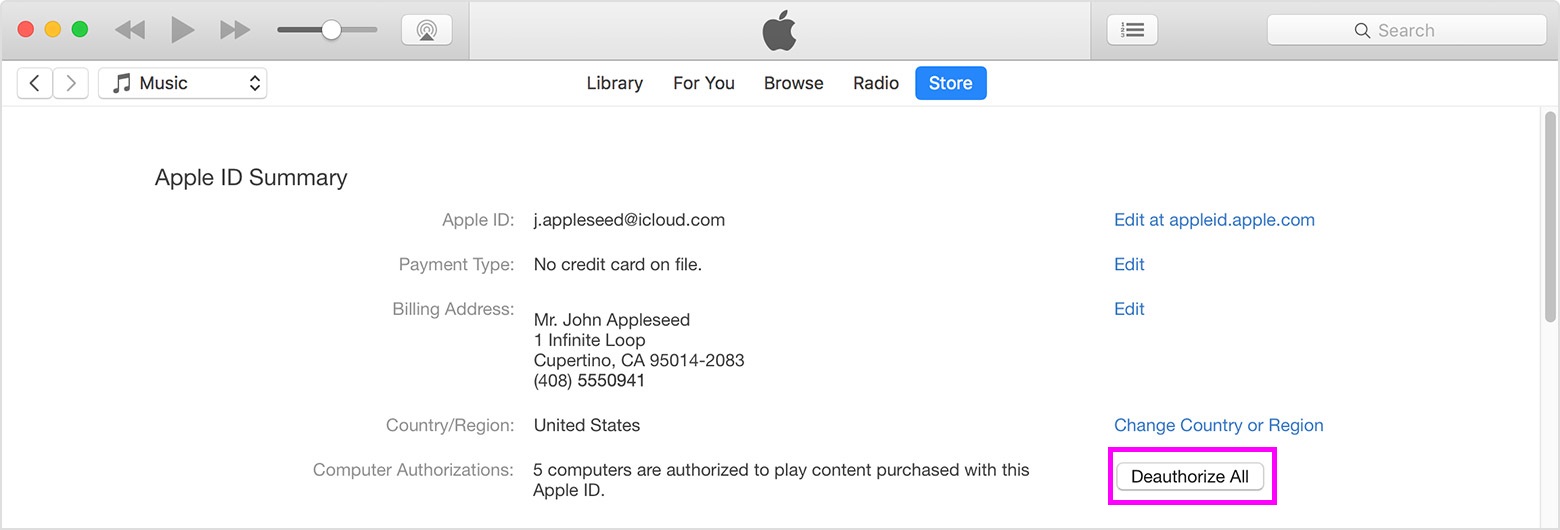
- In the Apple ID Summary section, next to “Computer Authorizations” option, you can see the number of computers that you have authorized.
How to deauthorize one computer using iTunes?
By following the below given steps you may easily deauthorize one computer using iTunes.
- Launch iTunes on the computer that you want to deauthorize.
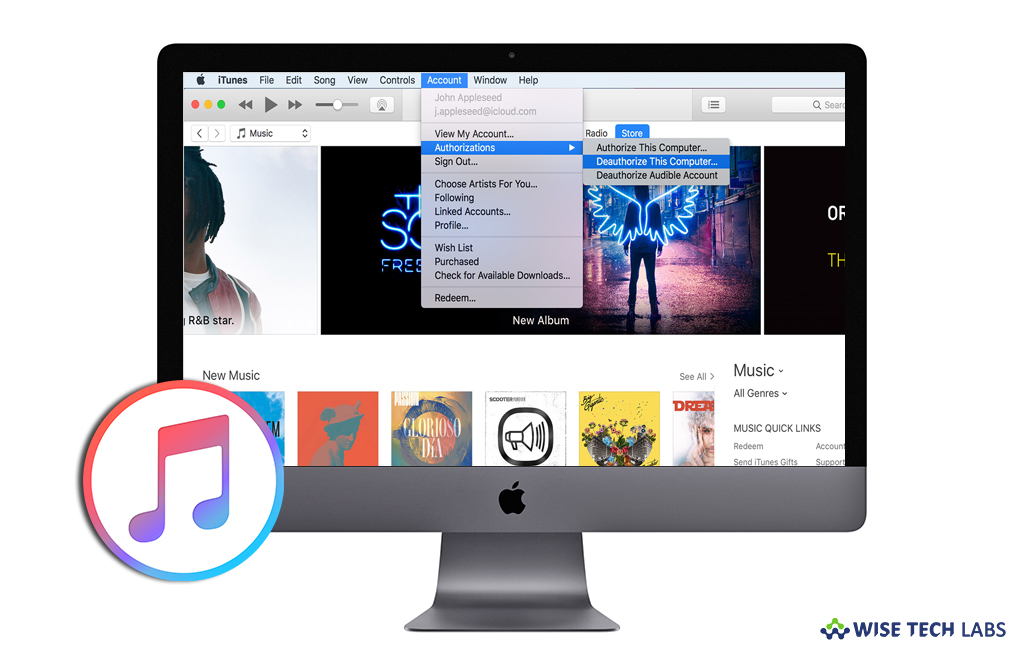
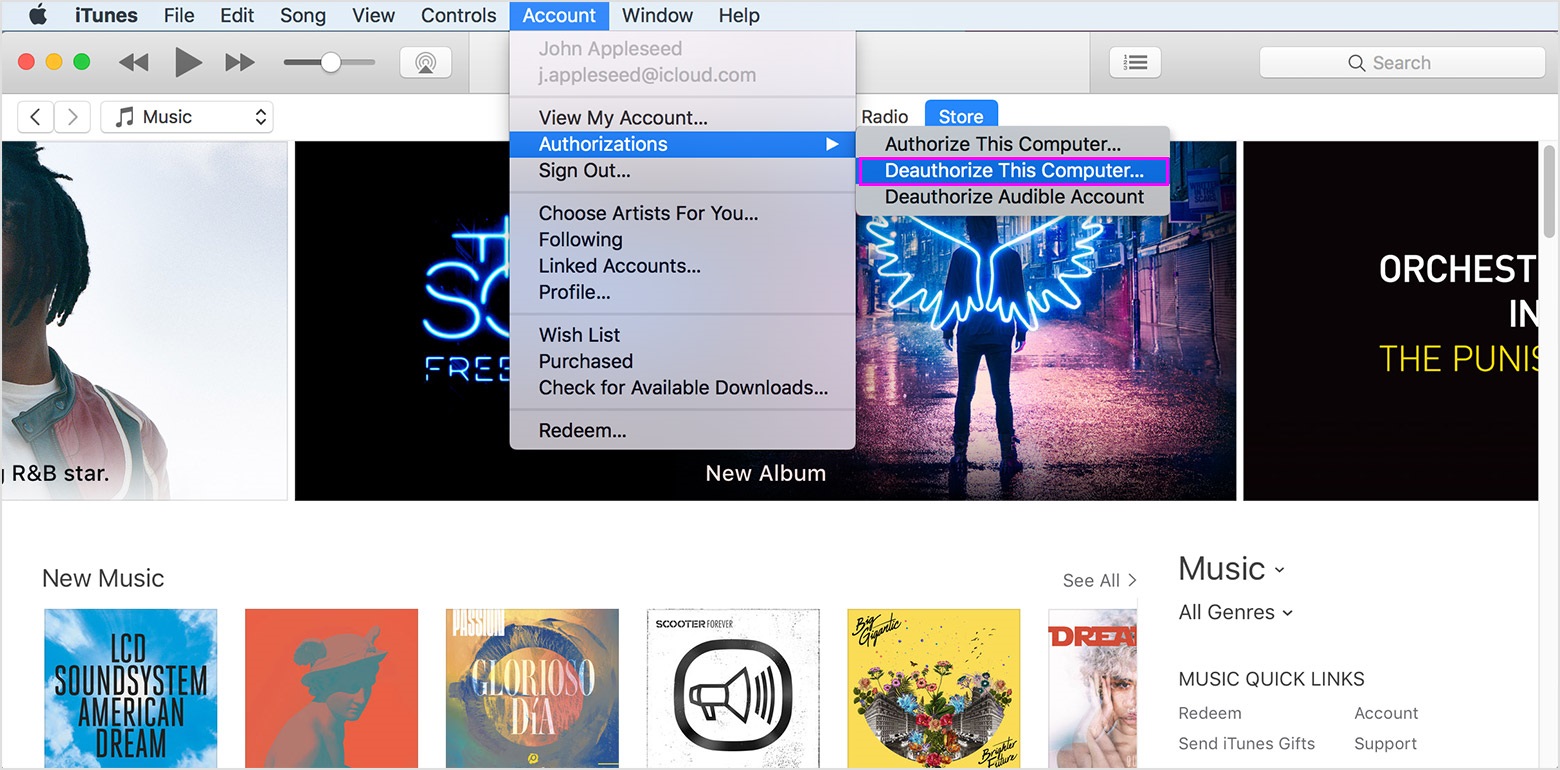
- Select Account > Authorizations > Deauthorize This Computer from the menu bar at the top of your computer screen or at the top of the iTunes window.

- When you are prompted, enter your Apple ID and password and then click “Deauthorize.”
How to deauthorize all computers using iTunes?
If you don’t have access to the computer that you want to deauthorize, you need to deauthorize all computers that you have authorized, follow the below given steps to do that:
- Open “iTunes” on your computer.
- If you are not already signed in, sign in with your Apple ID.
- Select Account > View My Account from the menu bar at the top of your computer screen or at the top of the iTunes window.
- Now enter your password and then press the “Return” or “Enter key” on your keyboard, or click “View Account” doing so will take you to the Account Information page.
- In the Apple ID Summary section, next to Computer Authorizations option, clicks “Deauthorize All.”

This is how you may easily deauthorize computers using iTunes. When required, you may authorize them again by following the below given steps:
- Open “iTunes” on your computer.
- Select Account > Authorizations > Authorize This Computer from the menu bar at the top of your computer screen or at the top of the iTunes window.
- Enter your “Apple ID” and “password” and then click “Authorize.”
Now read: How to gift amount or items from iTunes using your Mac or PC


What other's say