How to disable or enable network adapters on Windows 10
Network adapters are an important part of computer that is required to access internet on your PC. These network adapters should be enabled to access your local network, but sometimes, you need to disable them to stop the unwanted programs on your Windows 10 PC. By disabling these adapters, you may save battery life and fix some minor issues. Here, we will provide you some easy ways to disable or enable network adapters on your Windows 10 PC.
To disable or enable network adapters using Control Panel
You may easily disable or enable network adapters from control panel, follow the below given steps to do that:
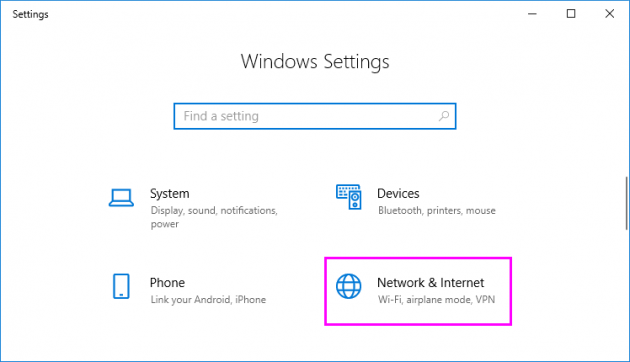
- Open “Settings” and click “Network & Internet.”
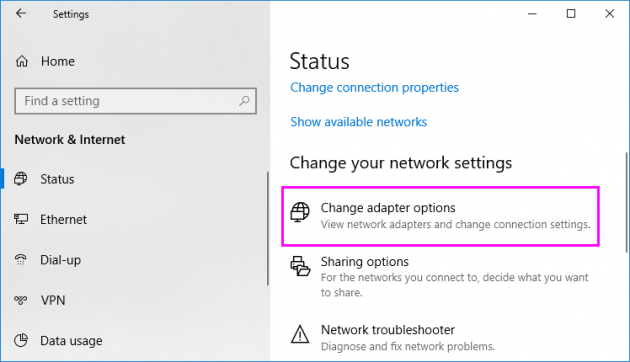
- Click “Status” and then click “Change adapter options.”
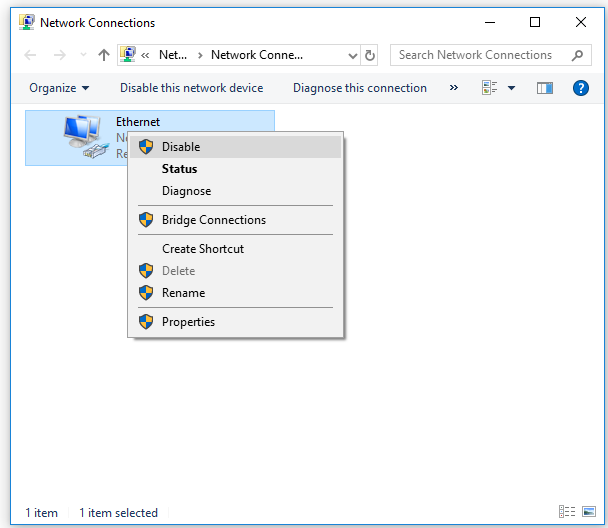
- Right-click on the network adapter and then select the “Disable” or “Enable.”
To disable or enable network adapters using Device Manager
You may also disable or enable network adapters with device manager, follow the below given steps to do that:
- In the start menu, type “Device manager” and hit enter to open device manager.
- Expand the “Network adapters”
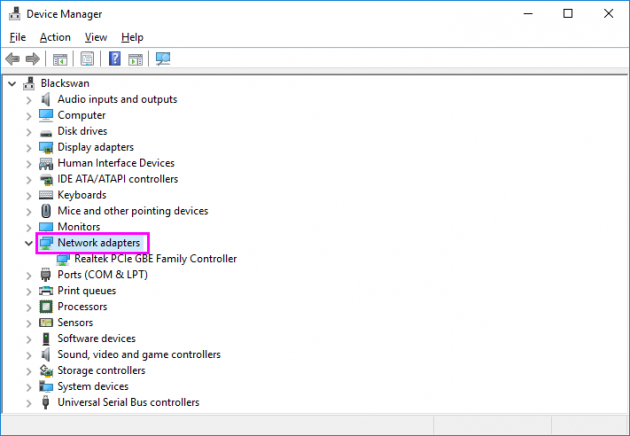
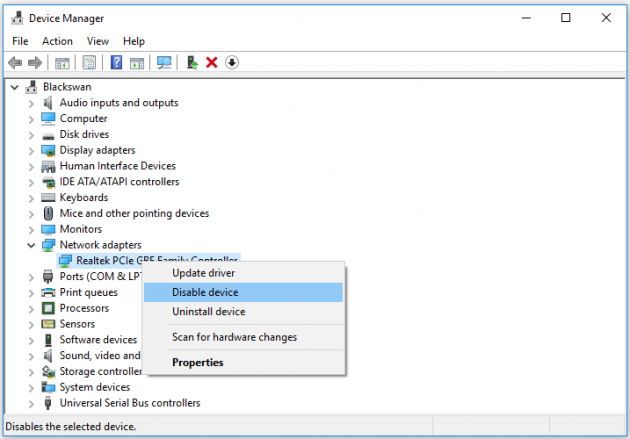
- Right-click the adapter you want and select the “Disable device” or “Enable Device”
To disable or enable network adapters using Command Prompt
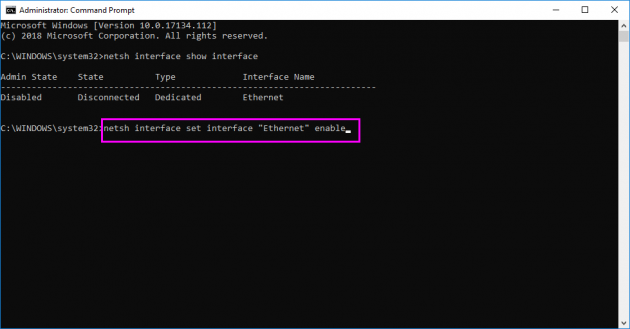
You may disable or enable network adapters using the netsh command tool on your Windows 10 PC, follow the below given steps to do that:
- In the Start Menu, type command prompts, right click on the top result and select “Run as administrator.”
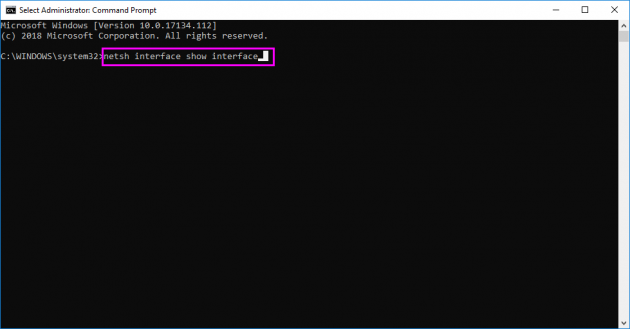
- Enter the below given command to identify the name of the adapter you want to disable or enable and press Enter:
netsh interface show interface
- Enter the below given command to disable or enable the Wi-Fi or Ethernet adapter and press Enter:
netsh interface set interface "YOUR-ADAPTER-NAME" disable
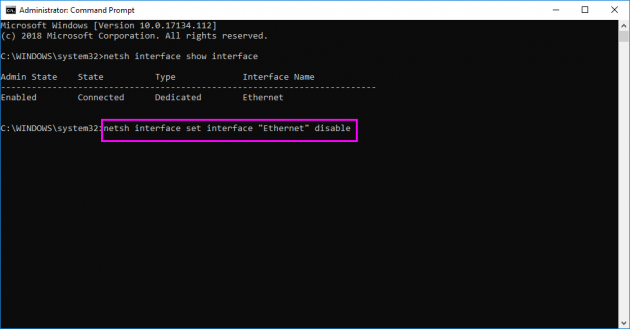
netsh interface set interface "YOUR-ADAPTER-NAME" enable
To disable or enable network adapters using PowerShell
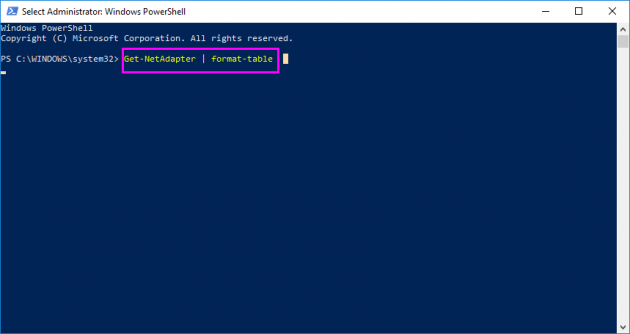
You may also disable or enable network adapters using PowerShell command line, follow the below given steps to do that:
- In the start menu, type “Windows PowerShell”, right-click the top result and select “Run as administrator.”
- Enter the below given command to identify the name of the adapter you want to disable or enable and press Enter:
Get-NetAdapter | format-table
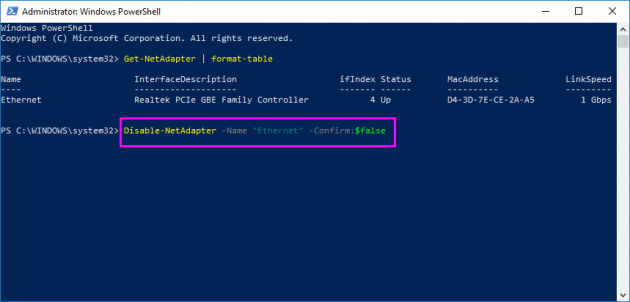
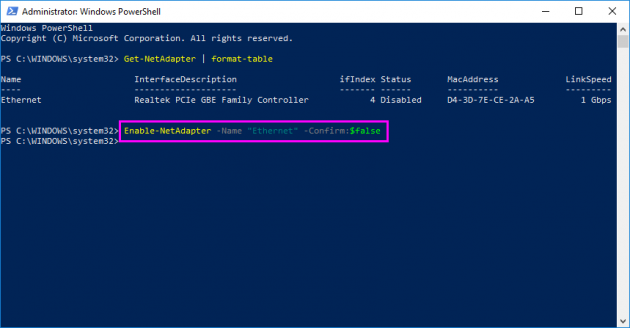
- Enter the below given command to disable or enable the Wi-Fi or Ethernet adapter and press Enter:
Disable-NetAdapter -Name "YOUR-ADAPTER-NAME" -Confirm:$false
Enable-NetAdapter -Name "YOUR-ADAPTER-NAME" -Confirm:$false


What other's say