How to enable or disable FileVault on your Mac

FileVault is the full-disk encryption that uses XTS-AES-128 encryption with a 256-bit key to protect your start up disk information from the unauthorized access. This disk encryption program is available for Mac OS X 10.3 and later. Once FileVault is enabled it helps you to create a master password on your Mac. If you forgot the password, the master password or recovery key can be used to decrypt the files instead. Here, we will provide you some easy steps to enable or disable FileVault on your Mac.
How to enable FileVault on your Mac?
You may easily enable FileVault on your Mac, once it is enabled; you always require logging in with your account password. Follow the below given steps to enable it:
- On your Mac, go to Apple menu > System Preferences.
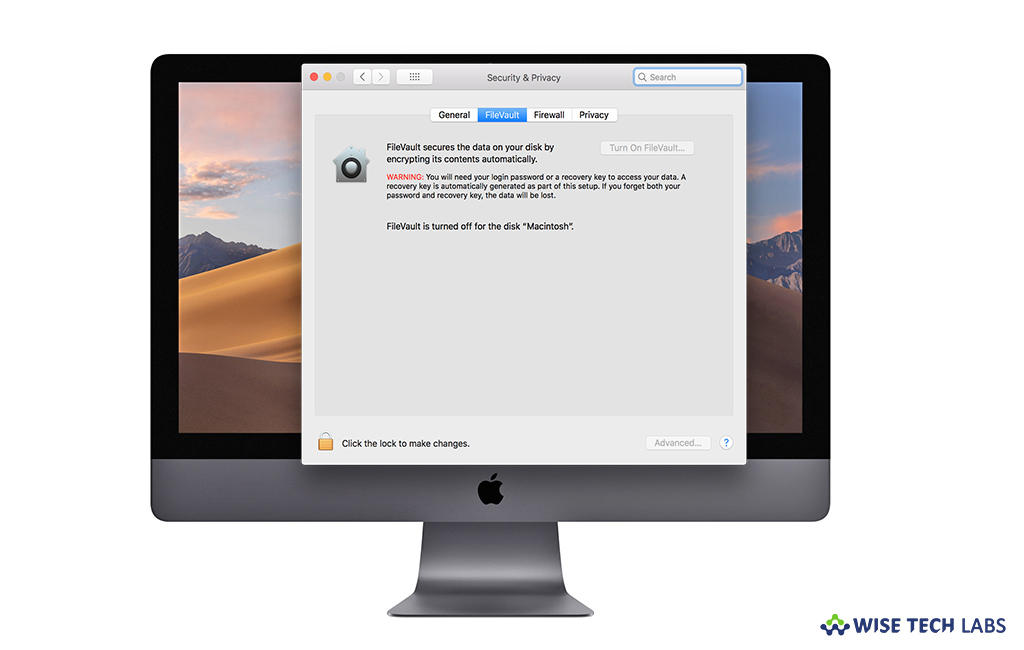
- Click “Security & Privacy” and then select the FileVault tab.
- Click lock icon and then enter an administrator name and password.
- Click “Turn On FileVault.”

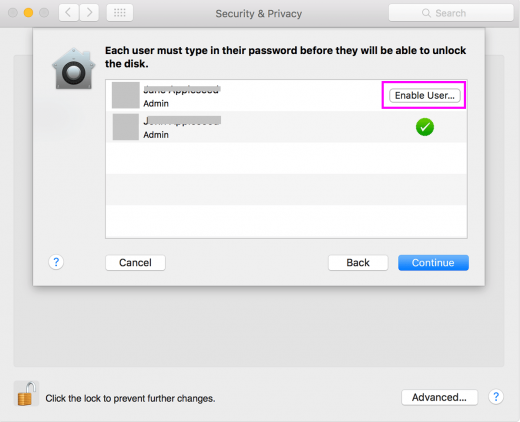
- If you have multiple accounts on your Mac, for each user account click the “Enable User” button and enter the user’s password.

- Moreover, if any account is created after turning on FileVault is automatically enabled.
How to disable FileVault on your Mac?
If you don’t want to encrypt your startup disk, you may disable FileVault on your Mac, follow the below given steps to do that:
- On your Mac, go to Apple menu > System Preferences.
- Click “Security & Privacy” and then select the “FileVault” tab.
- Click lock icon and then enter an administrator name and password.
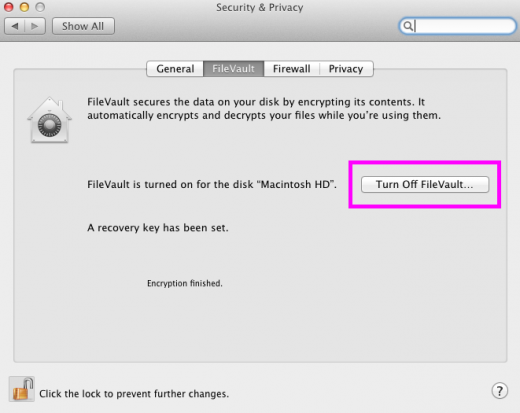
- Click “Turn off FileVault” to disable it.

This is how you may enable and disable FileVault on your Mac and check encryption and decryption progress in the FileVault section of “Security & Privacy” preferences.
Now read: How to create a recovery partition on your Mac


What other's say