How to enable or disable security questions on your Windows 10 PC

With Windows 10 v1803 build 17063, Microsoft added one mandatory thing that is to set security questions for local user accounts on Windows 10. This functionality was added for making easier the reset of local user account password. In case, you don’t want these security questions, Microsoft Windows 10 build 18237 allows you to disable it. After disabling this setting, Windows 10 will no longer ask you to configure security questions while creating new local user accounts on your PC. If you are wondering how to enable or disable security questions on Windows 10, let’s learn how to do it.
On Windows 10, You may enable or disable security questions using Local Group Policy Editor or Registry Editor.
How to enable or disable security questions using Local Group Policy Editor?
Before proceeding, make sure that you are using Windows 10 v1903 or higher to enable or disable security questions for local accounts. If you meet system requirement, you may easily enable or disable security questions with Group Policy Editor, follow these steps:
- On your Windows 10 PC, in the Start Menu, type “gpedit.msc“, right-click on the top result and select the option “Run as Administrator“.
- Now follow the below given path:
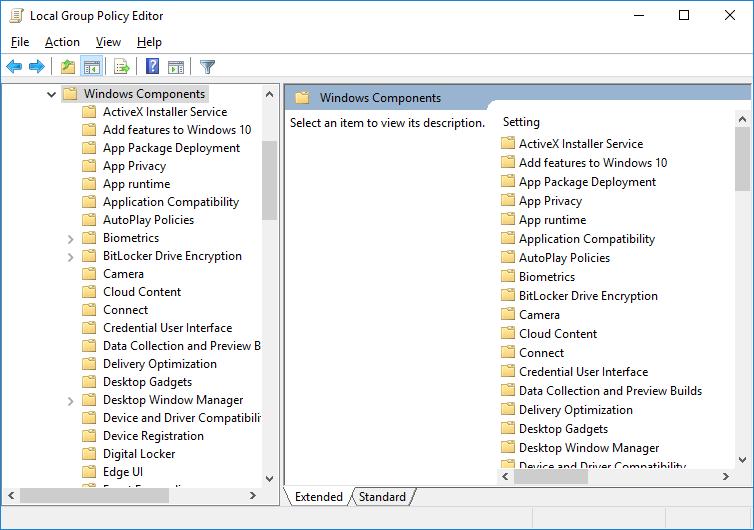
Computer Configuration >Administrative Templates > Windows Components > Credential User Interface.

- Here you may see policies related to credentials. On the right panel, find “Prevent the use of security questions for local accounts” policy and double click on it. This policy controls the security questions settings.
- Now, configure the settings as follows.
- To disable security questions: Select “Enabled” and click “Ok” to save changes.
- To enable security questions: Select “Disabled” or “Not Configured” and “Ok” to apply the changes.
- After making the changes, the policy will be automatically enforced on your next reboot. Moreover, you may also force update group policy by executing the “gpupdate or force command” in the command prompt window on your PC.
How to enable or disable security questions using Registry Editor?
If you are Windows 10 Home user, you may enable or disable security questions with Registry Editor, follow these steps:
- On your Windows 10 PC, In the Start Menu, type “regedit” and right click on the top result and select “Run as administrator.”
- Now, follow the below given path in the Registry Editor Window.
HKEY_LOCAL_MACHINE\SOFTWARE\Policies\Microsoft\Windows\System

- On the right panel, right-click and select “New > DWORD (32-bit) Value.”
- Name the new value as “NoLocalPasswordResetQuestions” and hit “Enter.”
- Now, double-click on the newly created value and then set the Value Data “1” to disable security questions and “0” to enable security questions.
Note: You may also enable security questions by deleting the newly created value.
- Once you are done, click on the “Ok” to save changes and then close the “Registry Editor.”
- Finally, restart your system to apply the changes.
Now read: How to set up multiple monitors on your Windows 10 PC


What other's say