How to enable System Restore in Windows 10 to protect against bad updates

How to Enable System Protection in Windows 10?
Microsoft is approaching to deliver new features to Windows 10 users. If you are Windows 10 user, you may be noticed a new feature on your computer, System Restore that is one of the important features of any Windows OS. By enabling this feature, you may create restore points before changes like new app installs or Windows update. System Restore helps you to go back to the previous version of the OS if your PC is not working as per your expectations.
Here, we will provide you steps to enable System Restore feature on your computer.
You may easily find System Restore feature in the control panel of your Windows 10. It is a very important part of any Windows operating system.
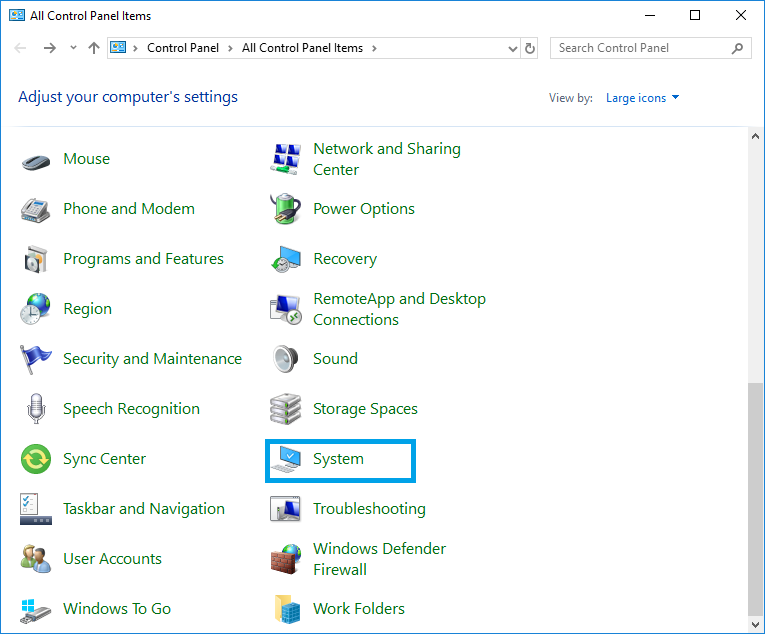
- In order to enable this feature, type Control Panel in your desktop search bar and click Control panel to open it.
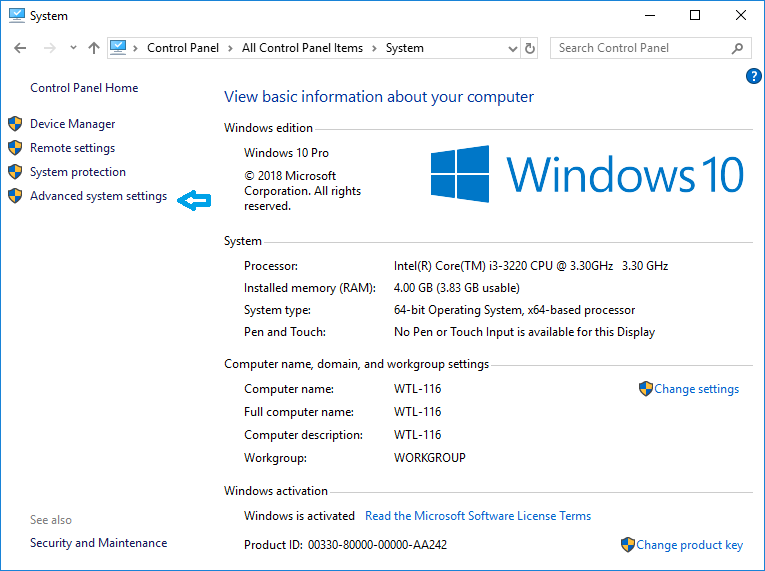
- Then, find System and click on it. It will show the System window with information about your Windows 10 PC.

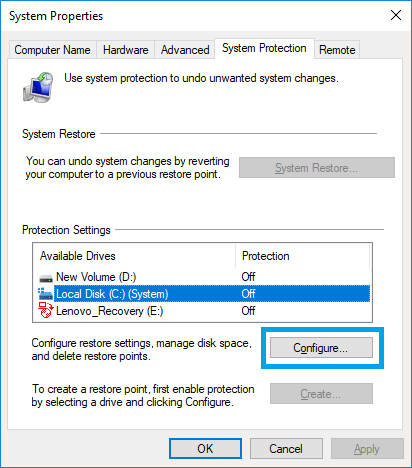
- Now, click Advanced System Settings on the left side of system window and open System Properties

- If you found the System Restore in Windows 10 is disabled. You need to click on your system drive and hit Configure to save your Windows 10 PC from the risk of bad updates or application installations.

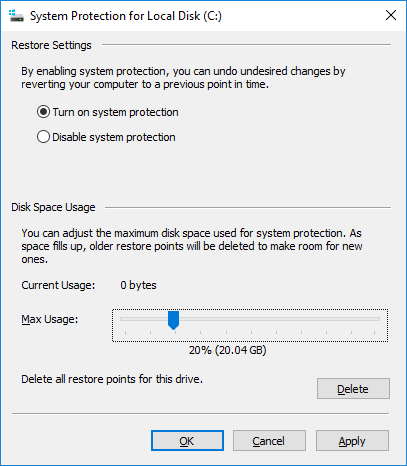
- Now, you can see the System Protection for Local Disk To enable the system protection, you need to check mark Turn on system protection.

- Below this setting, you may see an adjustment bar to decide how much disk space is reserved for System Restore. You may adjust it as per your need and click OK to save the changes.
This is how you can enable the System protection on your Windows 10 and it always helps you to restore your PC as per your need.


What other's say