How to add and set default printer in your Windows 10 PC
If you just bought a new Windows 10 PC or updated your existing PC to Windows 10 and want to connect a printer with it, you may easily add and configure printer using Windows 10 settings. Here, we will provide you some easy steps to add and manage printer on your Windows 10 PC.
How to add a printer on your Windows 10?
You may easily add printer by following the below given steps:
- On your computer, go to Settings > Devices > Printers & Scanners
- Click “Add a Printer or Scanner” to search for nearby printers, whether they are linked to your PC or connected to the network.
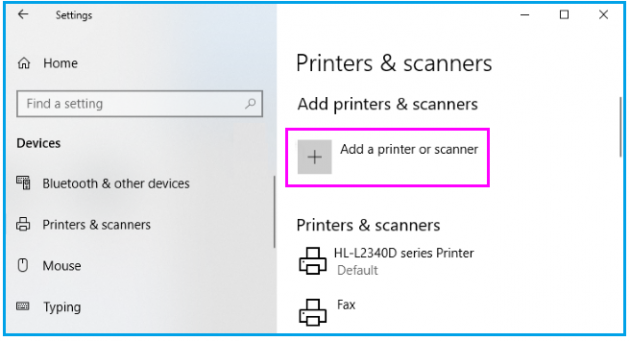
- You can see your printer’s name. If Windows doesn’t show your printer automatically, click on the “The printer that I want isn’t listed” link that appears.
- Here, you can see “old Add Printer” dialog box that allows you to scan older types of printers, directly connect to network printers and then add printers with custom settings.
- To add printer, you may also select Control Panel > Hardware and Sound > Devices and Printers.
- Click the “Add a Printer” button to get started.
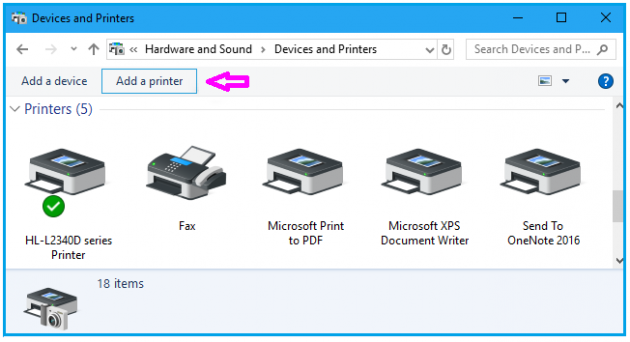
- Moreover, it automatically installs related drivers if not then you may visit printer manufacturer’s website to download and install the appropriate drivers or software package for your printer.
- In case you want to remove the printer, you may easily remove it from the Settings window by click a printer and clicking “Remove Device.”
- You may also remove it from the “Control Panel” by right-clicking a printer and selecting “Remove Device.”
How to set your default printer on Windows 10?
Windows 10 sets the printer as default that you use to take print out, whenever you select a printer from the list to print , it get automatically saved as default printer, if you want to set another printer as default , you may easily do it by following below given steps:
- In order to do that, go to Settings > Devices > Printers & Scanners and then uncheck the “Let Windows manage my default printer” option.
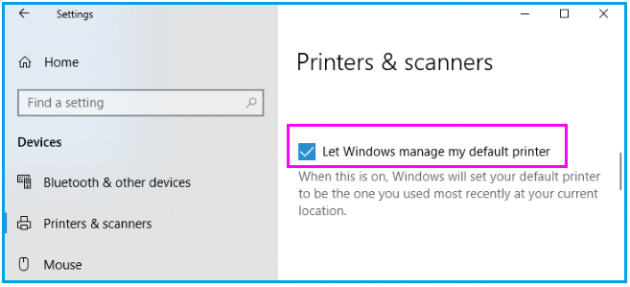
- Now, select a printer from the Printers & Scanners list, click “Manage” and click the “Set as Default” button.
- You may also do it from “Control Panel”, by right-clicking a printer in the Devices and Printers window and selecting “Set as Default Printer.”
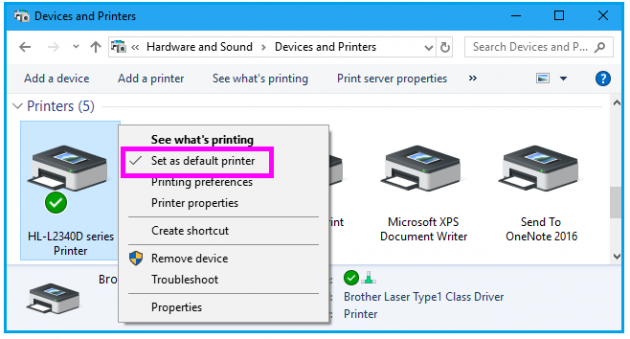
By following above given instructions, you may easily add and set the printer as default on your Windows 10 PC.
Now read: How to enable or disable screen auto-rotation in windows 10


What other's say