How to enable or disable Reserved Storage on your Windows 10 PC

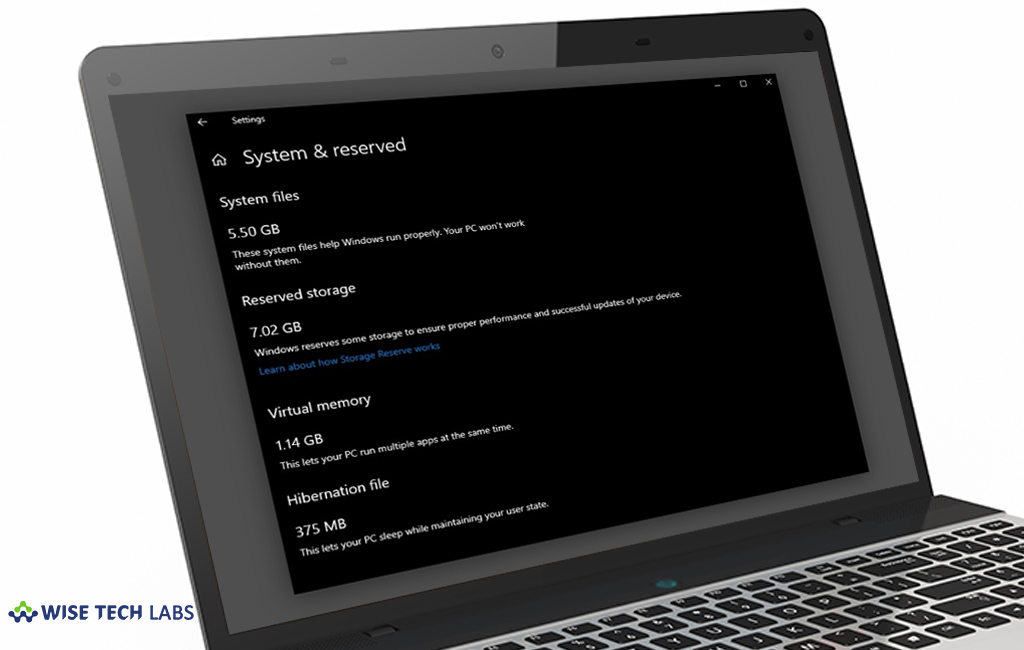
With the May 2019 update, Microsoft has started giving about 7 GB reserved storage for updates and optional files on Windows 10. Windows system requires a certain amount of free disk space to update the OS or build version. By adding reserving storage, you may avoid this update failure errors while installing the new update. By adding this feature, Microsoft provided a solution to fix the update issues for coming updates. Reserved Space is used for apps, temporary files, and system caches, enhancing the day-to-day performance of your PC. Here we will provide you a short user guide that will help you to enable or disable Reserved Storage on Windows 10, as per your need.
You may view how much reserved storage you have on your Windows 10, head to Settings > System > Storage. Click on the “Show more categories” link and then click the “System & reserved” item. Here, you may see reserved storage on your Windows 10.
If you are unable to see reserved storage option, make sure that it is enabled on your system.
You may easily enable or disable Reserved Storage on your Windows 10 PC, follow these steps:
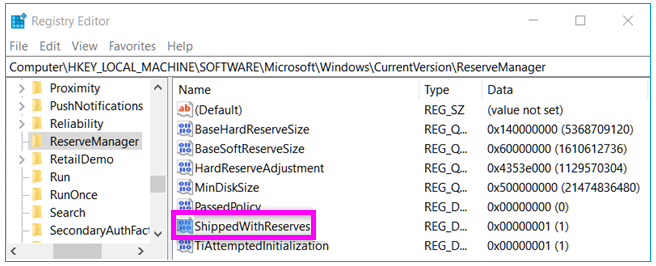
- On your Windows 10 PC, type “regedit” in the Run Command Window and then hit enter to open the Registry Editor.
- Now, follow the below given path:
Computer\HKEY_LOCAL_MACHINE\SOFTWARE\Microsoft\Windows\CurrentVersion\ReserveManager

- Now, double click the DWORD “ShippedWithReserves” and then set the value to “1.”
- Now, restart the computer, doing so will disable the reserved storage from your computer.
This is how you may easily disable Reserved Storage on your Windows 10 PC. In case you want to disable the storage, you need to follow the above steps again and set the ShippedWithReserves value to 0 again.
This is how you may easily enable or disable reserved storage on your Windows 10 PC.
Now read: How to stop Windows 10 from re launching the recently used apps on Startup


What other's say