How to configure iCloud on your Windows 10 PC

There are a large number of iPhone or iPad users who are using Windows computer. Being an iOS User, it is common that you want to access your iCloud account on your Windows PC. Microsoft added a feature in Windows 10 that allows you to configure iTunes and iCloud on your Windows 10. This really makes easy to sync your media files from your iOS device to your Windows 10 PC. Once iCloud set up on your computer, the photos, documents, and bookmarks on your PC are updated automatically on your Apple devices. Let’s learn how to configure iCloud on your Windows 10 computer.
You may easily setup iCloud on your Windows 10 PC by following the below given steps:
- In order to do that, download iCloud for Windows and then wait till to get it automatically installed. If it does not get auto installed, Open “File explorer” and set up iCloud.
- Once iCloud is installed, restart your computer.
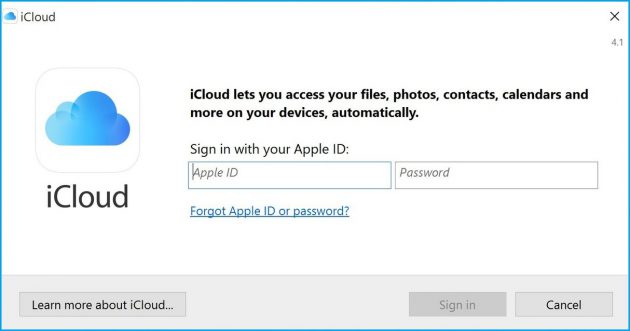
- Make sure iCloud for Windows is open. If it does not launch automatically, go to Start, open Apps or Programs and open iCloud for Windows.
- Type your Apple ID to sign in to iCloud.

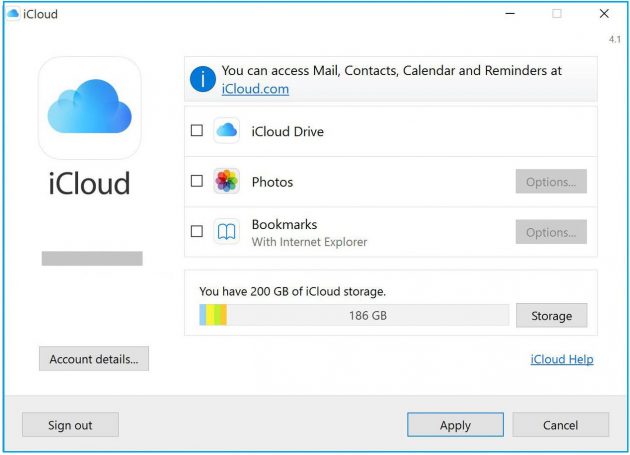
- After signing into iCloud, select the features and content that you wish to keep up to date across your devices.

- Click “Apply” to save the changes.
Once iCloud is configured on your Windows 10 PC, it will start syncing iCloud Photos, iCloud Drive and bookmark from Internet explorer to Safari.
Moreover, if you want to add iCloud to file explorer quick access panel, you may easily do that by following the below given steps:
- By default, you may access your iCloud Drive folder from your main User folder. The path will be like C:/Users/John/iCloud Drive
- Find the “director’s location” in File Explorer.
- Find the folder “iCloud Drive” and then right click on it.
- Click “Pin to Quick Access” to create a shortcut permanently in the left-side pane in File Explorer.
Now read: How to set up and use OneDrive in Windows 10 PC


What other's say