How to disable blur background of sign in screen on Windows 10

With Windows 10 build 18237, Microsoft added an acrylic blur effect to the sign-in screen background. This blurred background surface helps you focus on the sign-in task by moving the actionable controls up in the visual hierarchy while controlling their accessibility. If you want a sign in screen with clear background, Windows 10 new update version 1903 provides a feature to enable or disable this effect on your PC. You may easily disable blur background or acrylic effect using settings, Group Policy Editor and the Registry Editor. Let’s learn how to do that.
How to disable blur background of sign in screen using settings?
You may easily disable acrylic effect in the background sign screen from system settings. Follow these steps:
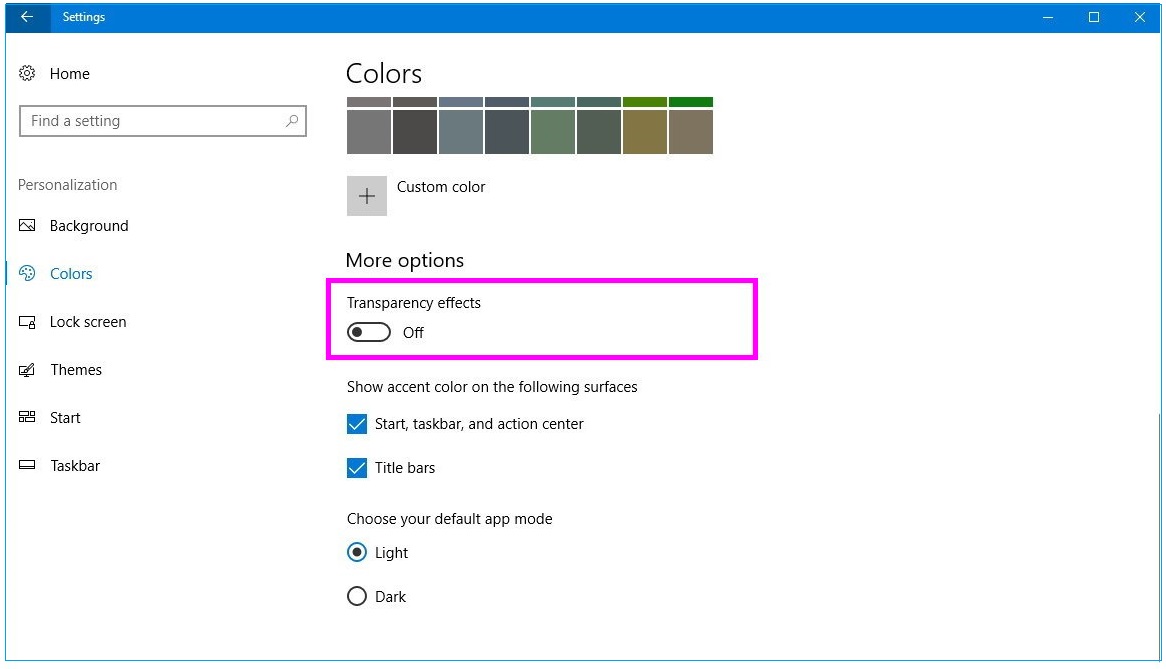
- On your Windows 10 PC, open “Settings” and click “Personalization.”
- Click “Colors” and then disable the button next to “Transparency effects.”

After making the above changes, you will see a clear background of sign in screen like previous versions.
How to disable blur background of sign in screen using Group Policy Editor?
If you are on Windows 10 Pro, you may disable acrylic effect in the background sign screen using Group Policy Editor. Follow these steps:
- On your Windows 10 PC, press “Windows key + R” keyboard shortcut to open the “Run” command window.
- In the run command window, enter “gpedit.msc”and click “OK” to launch the “Local Group Policy Editor.”
- Now, navigate to the below path:
Computer Configuration\Administrative Templates\System\logon
- On the right side pane, double-click the “Show clear logon background” policy and then select “Enabled.”

- Finally, click “Apply” and then click “Ok.”
How to disable blur background of sign in screen using Registry Editor?
If you are on Windows 10 Home, you may disable acrylic effect in the background sign screen using Group Policy Editor. Follow these steps:
- On your Windows 10 PC, in the “Start Menu”, type “regedit”, right-click the top result and select the “Run as administrator” option to launch the Registry Editor.
- Navigate to the below given path:
HKEY_LOCAL_MACHINE\SOFTWARE\Policies\Microsoft\Windows
- Now, right-click the “Windows”(folder) key, select “New” and then click on “Key.”
- Name the key “System” and then hit “Enter.”
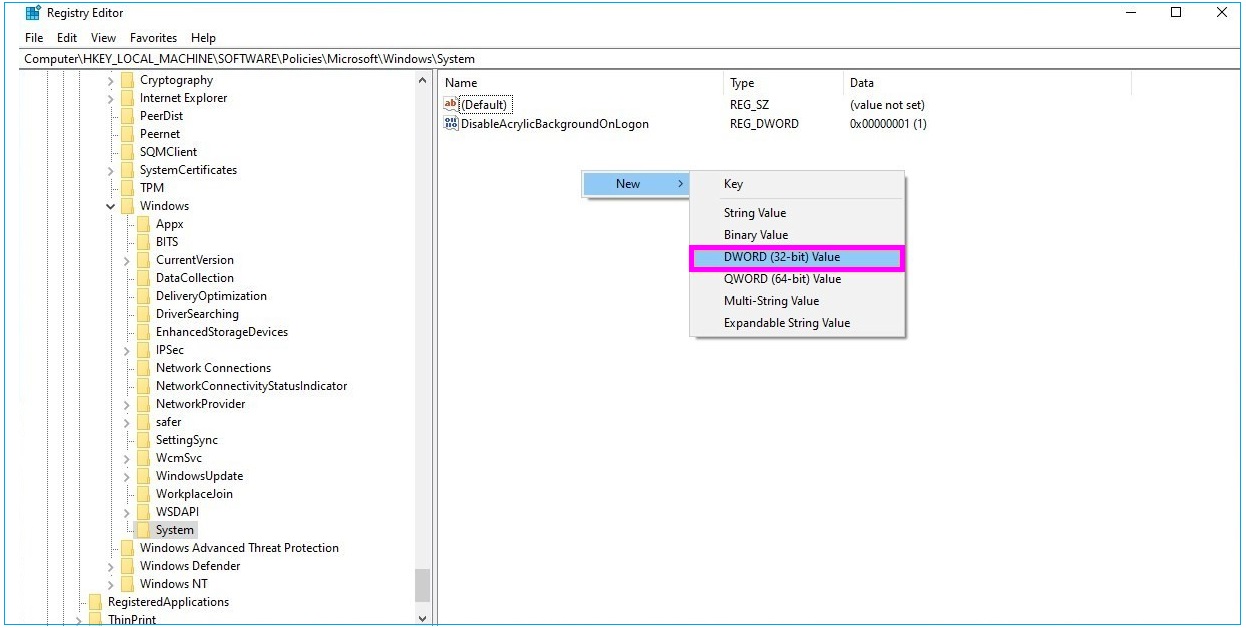
- Right-click the newly created key, select “New” and then click on the “DWORD (32-bit) Value.”

- Now, name the key “DisableAcrylicBackgroundOnLogon” and then hit “Enter.”
- Finally, double-click on the newly created DWORD, set the value from 0 to 1 and click “Ok” to save changes.
Now read: How to disable webcam on your Windows 10 PC


What other's say