How to erase a volume using Disk Utility on Mac

How to erase a disk using Disk Utility on your Mac?
On your Mac, you may use Disk Utility to manage internal disks and external storage devices. You may also organize and manage your data by splitting your disk into sections called partitions. If you want to move files from one computer to another, you may create a disk image to archive your work. Moreover, you may also check and repair errors on your disks and volumes. If you are facing any issue with any specific volume or disk on your Mac, you may erase that volume using Disk Utility on your Mac. Erasing a volume deletes all the files stored on it but does not affect other volumes. If you are not sure how to erase a volume, let’s learn how to do that.
By following the below given instructions, you may easily erase a disk or volume with Disk utility on your Mac.
- Before erasing the volume, if you have any files you want to save, copy them to another disk or volume.
- Now, open the “Disk Utility” app on your Mac using any of the below given methods, according to the type of disk or volume you want to erase:
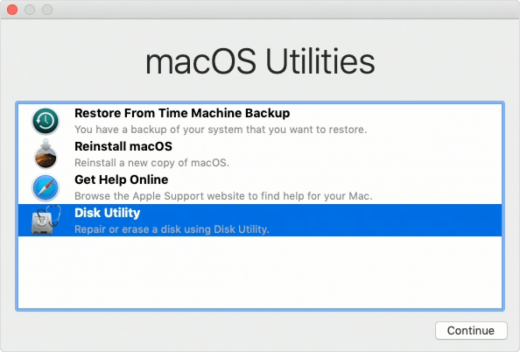
- If you want to erase your startup disk or startup volume: Start up from macOS Recovery and then select “Disk Utility” from the macOS Utilities window.

- If you want to erase any other type of disk or volume: Go to Applications>Utilities folder>Double-click Disk Utility.
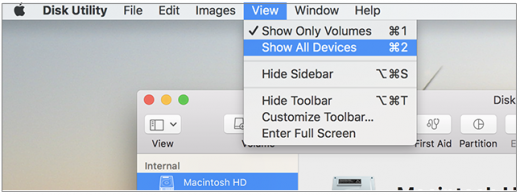
- Select View> Show All Devices.

- In order to erase the disk, eject each volume on the disk by selecting the volume in the sidebar and then clicking the “Eject” button.
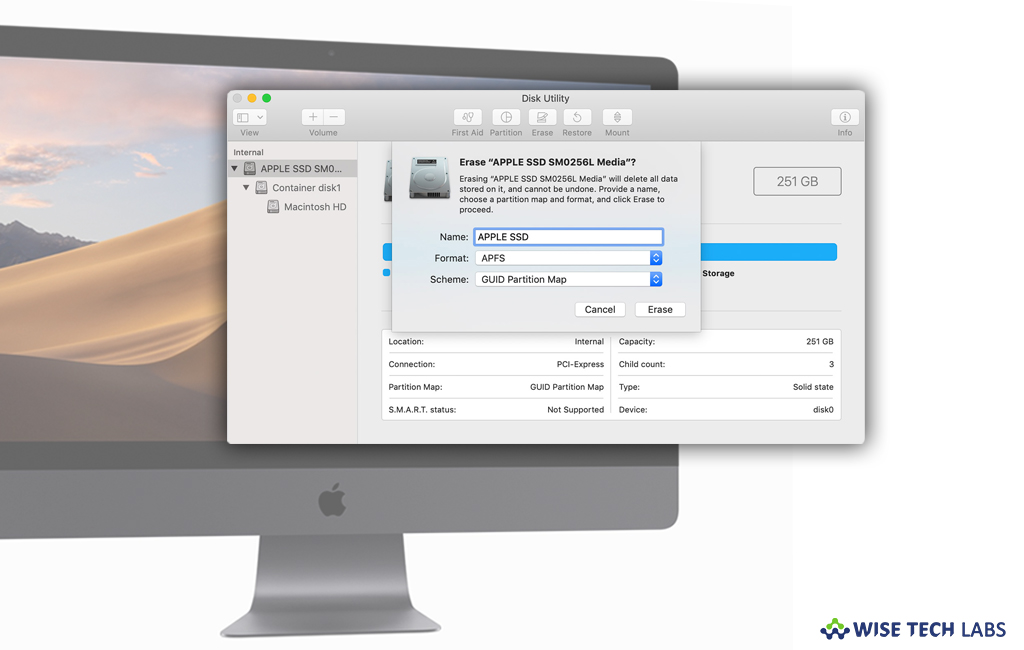
- In the sidebar, select the disk or volume and then click the “Erase” button.
- Now, select any of the below given formats by clicking the Format pop-up menu.
- APFS: It is recommended for volumes using macOS 10.13 or later.
- APFS (Encrypted):To encrypts the partition.
- APFS (Case-sensitive): To use case-sensitive to file and folder names.
- APFS (Case-sensitive, Encrypted):To use case-sensitive to file and folder names and encrypts the partition.
- Mac OS Extended (Journaled): To protect the integrity of the hierarchical file system.
- Mac OS Extended (Journaled, Encrypted): To require a password and encrypt the partition.
- Mac OS Extended (Case-sensitive, Journaled): To use case-sensitive to folder names.
- Mac OS Extended (Case-sensitive, Journaled, Encrypted): To use case-sensitive to folder names, require a password and encrypt the partition.
- MS-DOS (FAT): It is used for Windows volumes that are 32GB or less.
- ExFAT: It is used for Windows volumes that are over 32GB.
- Enter a name for the disk or volume that you want to erase.

- If you selected Mac OS Extended (Journaled, Encrypted) and want to stop the erased files from being recovered, click “Security Options”, select the time to over write the erased data using the slider and then click “OK.”
- If you over write the data three times for securely erasing magnetic media, it meets the US Department of Energy standard . To meet the US Department of Defense 5220-22-M standard, over write the data seven times.
- Select “Erase” and then click “Done.”
Now read: How to remove a hard drive partition on your Mac


What other's say