How to disable or enable external devices on your Windows 10 PC

In Windows 10, sometimes we need to disable external devices to troubleshoot the issues related to hardware. For example, if the Bluetooth adaptor suddenly stops working, you try to fix it by replacing it with an external adapter. Similarly you disable or enable external devices while fixing the specific hardware issues on your PC. There are many other reasons when you need to disable or enable external devices on your Windows 10 PC. Let’s learn how to disable or enable external devices using device manager on your Windows 10 PC.
How to disable external devices on Windows 10?
In Windows 10, you may easily disable external devices using the device manager by following the below given steps:
- In the Start menu, search for Device Manager and click the top result to open the Device Manager.
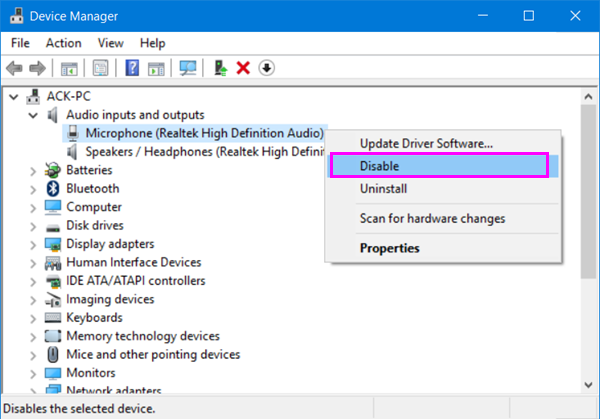
- Now, expand the category with the device that you want to disable.
- Right-click the device and then select the “Disable device.”

- Finally, click “Yes” to confirm the changes you made. Besides, you may also click “Properties” and disable the selected hardware in “Driver” tab.
How to enable external devices on Windows 10?
If you want to enable any external device on your Windows 10 PC, you may easily do it by following the below given steps:
- In the Start menu, search for “Device Manager” and click the top result to open the Device Manager.
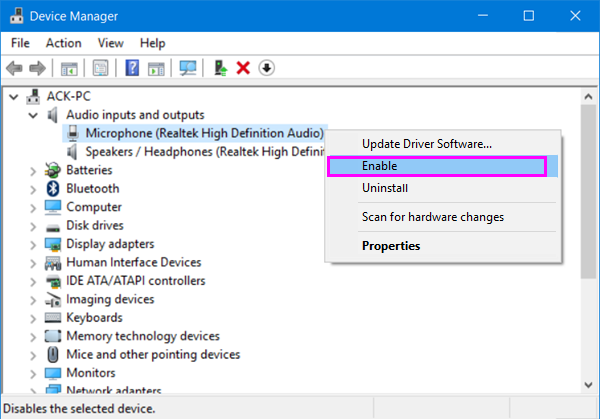
- Now, expand the category with the device that you want to disable.
- Right-click the device and then select the “Enable device.”

- Click “Yes” to confirm the changes you made. Besides, you may also click “Properties” and enable the selected hardware in “Driver” tab.
This is how you may easily enable or disable external devices on your Windows 10 Computer as per your need. Moreover, if you have another hardware device that may conflict, we suggest you to disable the existing device before enabling the new one.
Now read: How to stop Windows 10 from re launching the recently used apps on Startup


What other's say