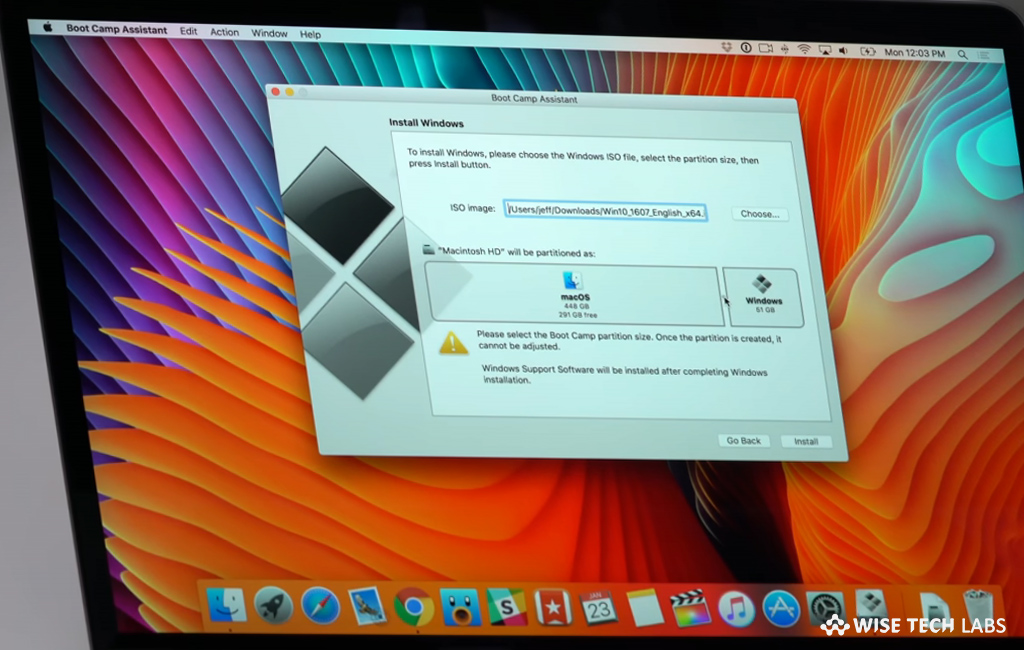
How to install Windows OS on Mac using boot camp

How to install Windows on Mac with Boot Camp ?
If you are using Mac and want to install Windows on it to access Windows apps. Initially, there was not any way to run Windows programs or apps on Mac but now there are many ways to install Windows OS on your Mac. Once Windows get installed on your Mac, you may easily run Windows application on it. Most of the Mac users use Boot camp to play only Windows Video games on Mac. By using Boot camp, you may install Microsoft Windows on your Mac. After installing Windows, you may restart your Mac to switch between MacOS and Windows. If you want to run Windows on your Mac, here we will provide you some easy steps to do that.
Before you start, make sure you have a Mac and a Microsoft Windows installation media or disk image (ISO) containing a 64-bit version of Microsoft Windows. You should have at least 55GB of free disk space on your startup drive and a blank 16GB or larger USB 2 flash drive.
If you have all the system requirements, you may install Windows on your Mac by following the below given steps:
- First of all you need to check system information including processor, hard drive space and RAM.

- After checking all the system requirements, you need to get a Windows disk image usually when you buy Windows it comes as a disk image file (ISO) that you download or as an installation disc or USB flash drive.
- In case you receive a DVD, you might need to create a disk image of it to work with Boot Camp. If you know the Windows version, you may download a disk image from Microsoft.
- Next, open the Boot Camp Assistant that provides you a proper guidance to install Windows on your Mac.
- In order to launch Boot Camp Assistant, go to Utilities folder >Applications folder and then follow the onscreen instructions to repartition your startup drive and download required software drivers for Windows. During Installation, connect a blank USB 2 flash drive when you prompted.

- After completing the assistant, your Mac restarts to the Windows installer. When you are prompted where you want to install Windows, select the “Boot Camp” partition and then select “Format.”
Note: You need to follow this step only if you are using Flash drive or optical drive to install Windows.
- Now unplug the external devices, if there is any, such as displays and disks, which are not required, while installation.
- After doing that, follow the onscreen prompts to install Windows. Once installation is completed, your Mac starts up in Windows and open an installer for Windows Support Software.
- After installing Windows and Windows support software, you may switch back to macOS using the Boot Camp system tray item in Windows.
- Select the macOS volume and then restart your Mac.
- In order to switch from macOS to Windows, you need to use the Startup Disk preference pane for selecting the Boot Camp volume and restart your Mac. You may also hold down the “Option key” after restarting your Mac to select between macOS and Windows.
By following the above given steps you may easily install Windows on your Mac and switch between macOS and Windows, whenever you want.
Now read: 5 Ways To Run Windows Applications On A Mac


What other's say